
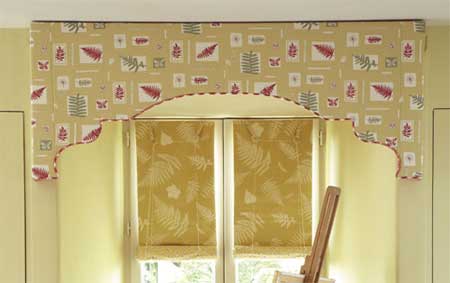
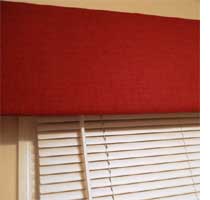
Pelmets are back in fashion
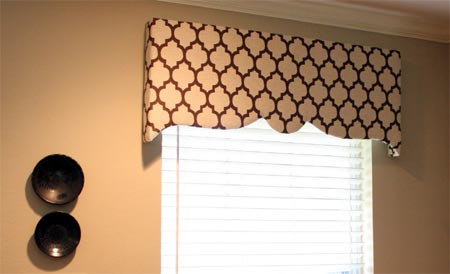
Perhaps it's my age, but I have always like to have a pelmet at the top of the window, especially when hanging blinds. For me, it provides a finishing touch and hides all the blind hardware out of sight. Here's how to make a decorative pelmet ...
YOU WILL NEED:
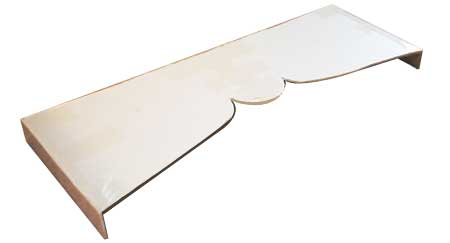
9mm SupaWood - cut to required length and width
Jigsaw and clean cut blade - if you are doing decorative cuts
Pencil
Tape measure
Panel pins
Hammer
Impact Drill/Driver - with hammer function - and assorted drill and screw bits
50mm cut screws
Ponal wood glue
fischer SX or UX wall plugs and screws
180-grit sandpaper
Spirit level
Metal angle brackets and screws
Clamps
Measure up
To find the overall width of the pelmet, measure the window opening and add at least 100mm onto each end to allow the curtains to be drawn back without creasing. The depth measurement should be the distance from the wall to the front of the curtains plus at least 25mm.
HERE'S HOW:
1. Decorative touches
Before assembling the sections, use the jigsaw to make any decorative cuts.
DIY Tip:
If you want to make the front of your pelmet a special shape, use card to make a template exactly half the width of the section. Draw one half of your design on the card and tape this to the supawood. Cut around the pattern, untape the pattern and flip it over to use as a template on the other half of the board. This will ensure the pattern is symmetrical.
2. Assembling the sections
Attach the sides to the front section using wood glue and panel pins. Clamps are handy for holding everything together if you don't have an extra pair of hands available to help you.
If you are covering the pelmet with fabric - do this before affixing the hinges.
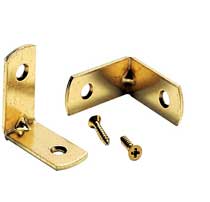
3. Attach the brackets
The pelmet will be attached to the wall with metal angle brackets. Attach these to the top and bottom of both sides with small screws. Drill holes in the wall to the diameter of the wall plugs, and 10mm longer than the length of the wall plugs. Insert the wall plugs.
4. Fix the pelmet
Hold the pelmet in place, and with a spirit level along the top, mark through the metal bracket fixing holes.
Screw the pelmet to the wall.
via: pearl street interiors - ambience home furnishings - christie chase