
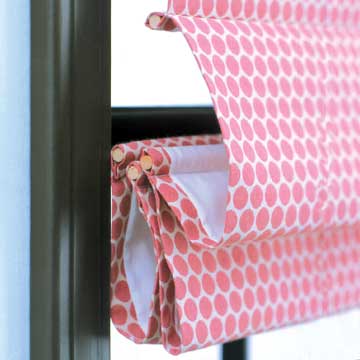
DIY Roman Blind
Tailored yet functional, a Roman blind is perfectly suited for dressing windows anywhere in the home. This blind adds plenty of attitude to a stylish bathroom.
YOU WILL NEED:
Fabric
Lining fabric
1 x 5cm pine board (width determined by size of window)
Two screw eyes
Five 12mm-diameter wooden dowels
Ten small plastic rings
Shade-and-blind cord
Cleat (with fasteners) to wrap cord at desired pleating
HERE'S HOW:
Allow for 1.5cm seam allowances unless otherwise noted. Sew with right sides together unless otherwise stated.
Cut the Fabrics and Mounting Board
1. Measure the height and width of the window inside the window recess or frame.
2. Determine the size to cut the shade fabric. (Cut length of shade = window height + 15cm for mounting onto board + 15cm drop from mounting board + 15cm for each fold + 5cm for each dowel casing. Cut width of shade = window width + 5cm.) Note: Our shade has four folds with five dowel casings. From the shade fabric, cut one panel to this measurement.
3. Determine the size to cut the lining fabric. (Cut length of lining = cut length of shade. Cut width of lining = measured width of window inside the window recess or frame.) From the lining fabric, cut one panel to this measurement.
4. Cut the 1 x 5cm pine board to the measured window width. Mark points 10cm from each end of the board for screw eyes. (For wide windows, measure even segments and mark two more points along the board for screw eyes.) Drill shallow pilot holes. Set the board aside.
Assemble the Roman Blind
1. With right sides facing, sew the lining panel to the shade panel along the side edges. Turn to the right side; press so the lining is centered on the back of the shade.
2. Using a ruler, measuring tape, and an air-soluble fabric marking pen, measure and mark the placement of the 5cm-wide dowel casings. Stitch the dowel casings exactly on these lines.
3. Turn the bottom edge of the shade under 1.5cm, turn it under an additional 2cm; press. Stitch just inside the folded edge to make a bottom dowel casing.
4. Place the mounting board 150cm below the top edge on the lining side of the shade.
5. Fold the raw edge of the shade over the top of the mounting board. Check the fit to the window and adjust the fabric on the mounting board if necessary. Staple the shade to the back of the board. Insert the dowels in the casings.
6. Hand-stitch a small plastic ring 100cm inside each side edge on each dowel casing.
7. Place the cleat on the right side of the window frame about midway between top and bottom. The cleat holds the cords taut. If you have small children in your home, place the cleat closer to the top of the frame, lowering the risk of possible entanglement. Drill pilot holes in the frame. Mount the cleat.
8. For the left cords, cut a length two times the measured window length plus the measured width. Tie one end of the cord to the lowest rings on the left side of the blind. For the right cord, halve the remaining length. Tie one end of the cord to the lowest rings on the right side of the shade. Thread the cords through the column of rings and through the screw at the top. Thread all cords through the far right screw eye. Pull the cords to take up the slack and trim the cord ends even. To raise the shade, gently pull the cords, causing the fabric to pleat. At the desired height, secure the cords to the cleat with a figure-eight motion.
9. Insert two wood screws through the bottom of the mounting board to attach the shade to the inside of the window.
10. To set the pleats, raise the shade to the highest position and secure the cords to the cleat. Arrange the pleats by hand and leave in place for one week.