
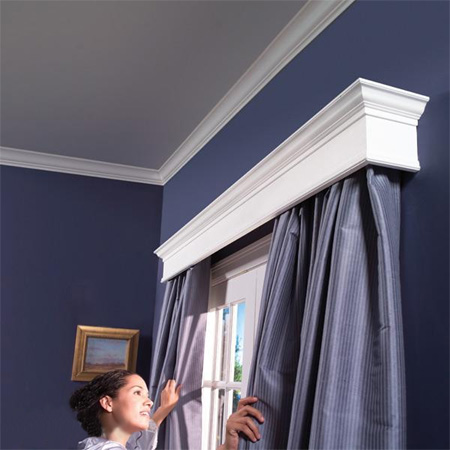
How to build a box pelmet
We've previously discussed adding architectural detail to a home using crown moulding, cornice and moulding and trim. A box pelmet is one of those quick and easy do-it-yourself projects that adds instant impact to any room.
YOU WILL NEED:
16mm Supawood* is the best board to use for this project, as it has a smooth finish for painting. You will need to measure up the width of the window and add on 200mm to 300mm on either side to determine how much you need to make your box pelmet. The height of a decorative pelmet can be anywhere from 150mm up to 300mm, again depending on the size you want to match the style of the room or space.
DIY TIPS:
Specify SupaWood when buying your board for this project, as there are plenty of inferior MDF products on the market that just don't have the same silky smooth finish, and you end up sanding the surface of the board to get it smooth - not a good idea.
Builders Warehouse stock a selection of SupaWood and you can have these cut to size to fit your windows. You will also find a varied selection of moulding and trim for adding a decorative finish to your box pelmet.
HERE'S HOW:
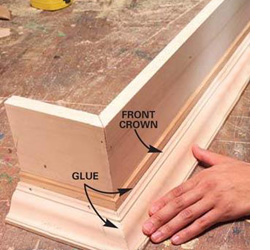
Start of by making a basic box, consisting of top, sides and front. No rules here... you can join the box together using glue and clamp until dry, you can use dowels or biscuits, or you can drill countersunk pilot holes and screw the box together - filling in the holes with wood filler and sanding smooth. Once you have the basic pelmet box you can start measuring and cutting the various pieces to add to the top for decorative effect.
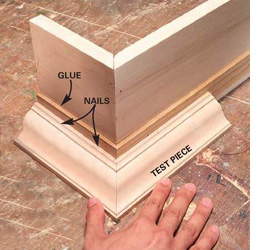
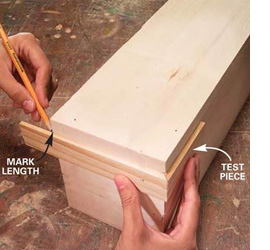
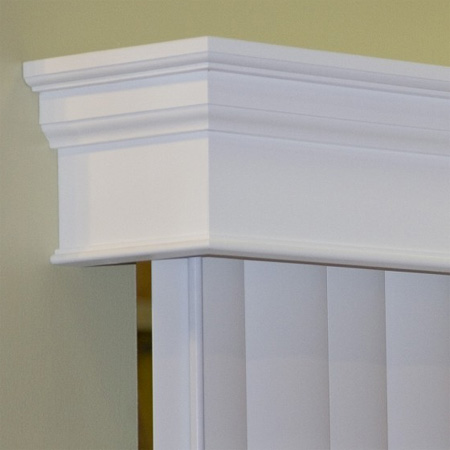
You will need a selection of moulding and trim for the bottom edge and decorative top. All the pieces will need to be cut in a mitre box with a backsaw, or using a mitre saw. Fasten the decorative pieces with No More Nails adhesive and hammer in a couple of panel pins here and there.
Continue to measure and cut as you work from the one side to the front and then to the other side. I prefer to do my pieces one by one in this order, so that I can match up the edges precisely and avoid having gaps.
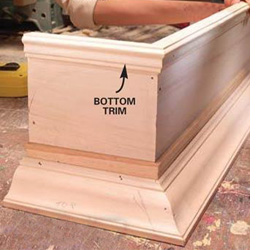
Add the bottom trim in exactly the same way as for the top, working from the side, round to the front and finishing off with the other side.
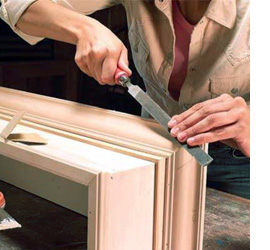
If there are any differences where the sections join together at corners, you can easily sort this out with a file for larger bits, or sandpaper for minor differences. You can fill in any gaps with No More Nails adhesive.
Sand the entire finished box with 240-grit sandpaper.
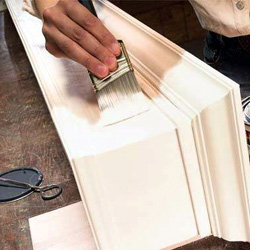
For finishing the pelmet box you can use acrylic paint, such as Plascon Polvin, or Rust-Oleum 2X spray paint. There's no need to apply a primer for use on SupaWood, just make sure to apply a light, even first coat and let this dry properly before continuing.
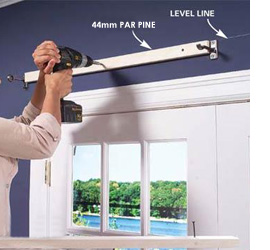
To mount your new box pelmet onto the wall you will need a quality drill that has integral hammer function. The new Bosch PSB 18 LI-2 is a Drill/Driver with built-in hammer function, that is cordless, and uses Li-Ion batteries - so you get everything you need for home DIY in one power tool. Use a spirit level to draw a line across the top of the window that spans from the top of the existing curtain rail.
You need to fit a 44mm wide PAR pine board to the gaps between the rail or rod brackets. To do this, use Fischer SX8 nylon wall plugs, an 8mm Alpen all-purpose bit and 5 x 45mm screws. Have someone help you to hold the pine batten against the wall and lined up with your drawn line. Drill three mounting holes through the batten to a wall depth of 45mm. Now remove the batten, pop in the wall plugs, and screw in position.
familyhandyman.com
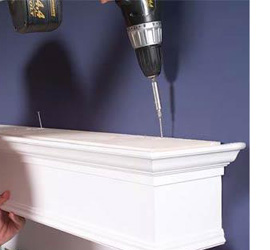
Now all that's required is to screw the top of the pelmet box onto the top edge of the batten. Don't use nails for this, as there may come a time when you need to remove the pelmet and screws will allow you to easily remove the pelmet box from its mounting.
firstsense.wordpress.com
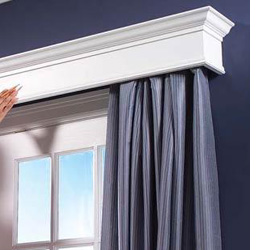
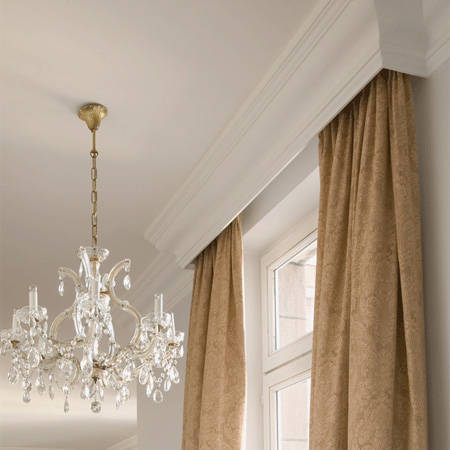
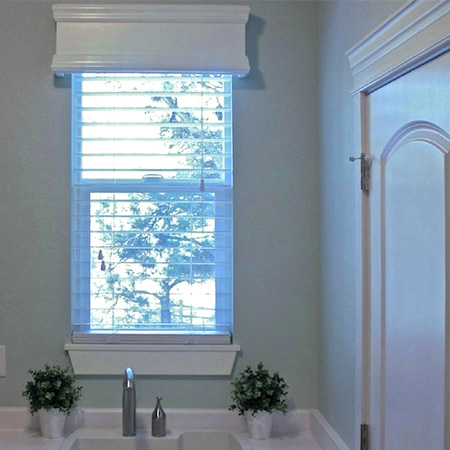
Pelmets are not only ideal for finishing off at the top of curtained windows, they also look great as a finishing touch for windows fitted with blinds - hiding the hardware out of sight.
cornicesmith.com
1.bp.blogspot.com