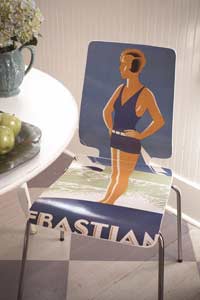
How to decoupage furniture
Learn how easy it is to decorate your furniture with decoupage.
YOU WILL NEED:
Furniture piece
Detergent cleaner
Plain paper for template
Pencil Art print or poster
Scissors
Glue or decoupage medium
Foam brushes
Water source
Sponge
Roller
Acrylic sealer or glaze coat
CONTINUES BELOW
HERE'S HOW:
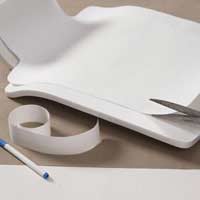
1. Clean the furniture item (if needed, fill in chips or nicks with Alcolin Fill 'n Fix). On a plain piece of paper (such as a brown or white wrapping paper), trace the shape of the furniture piece as a template.
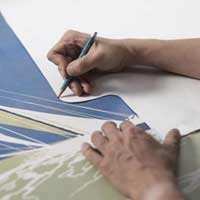
2. Move the template around the image to find the section you want to cover the furniture. Using a pencil, lightly trace the shape of the template over the image.
DIY Tip:
• Avoid decoupaging with thin paper, such as newsprint or rice paper, because it wrinkles. If you have a design you love that’s on thin paper, take it to the copy store for laser printing (ink-jet copies smear in water). Thicker wrapping paper and posters are ideal for this type of decoupage project.
• Be sure to use sharp scissors when cutting. It’s better to err on the side of having too much image - overlap is easily trimmed off. If the image is too small, cut off a little piece of the print as a patch.
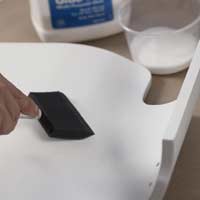
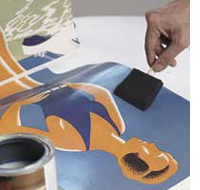
3. Paint household glue over the entire surface of the item using a foam brush. The glue should still be wet when the paper is positioned on the surface.
DIY Tip:
• For a clean edge, trim any overlaps with a very sharp knife when the paper is dry and stiff with glue.
4. Submerge the paper in the water just long enough for it to relax, about 10 seconds. This will make it easier to mold the paper to your furniture.
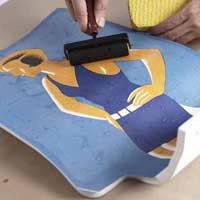
5. Align the paper with the furniture edges. Keep your hands wet or the paper will tear. Use a wet sponge and wet brayer to work out excess glue, water, and air. Work hands and tools outward from the center to flatten the surface. Check frequently within the first hour after application to smooth late-forming air bubbles with wet fingers. Dry overnight.
DIY Tip:
• If the paper tears during the smoothing process, fix it as best as you can and then touch up with a marker before applying acrylic sealer.
6. Apply three to five coats (one per hour) of acrylic sealer with a foam brush.
More ideas:
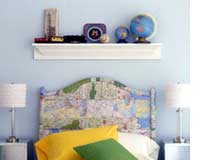
Dress up a plain headboard with maps of the world for a little boy.
Turn old family photos into an intriguing wall display by showing them off in vintage silver and ceramic pieces. Mount the prints onto plates, trays, and other pieces using glue or decoupage medium.