
Easy upholstery technique
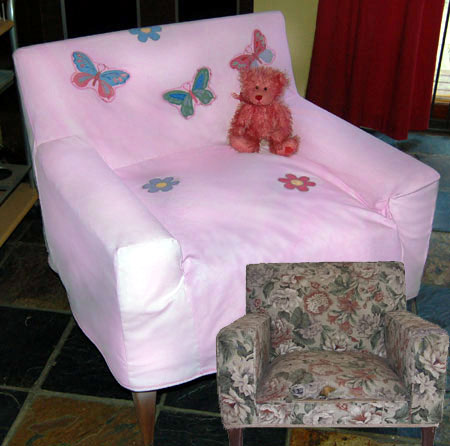
In this article I show you just how easy it is to recover an old chair. You don't need any special tools other than a sewing machine and a Bosch Tacker (or a stapler). In fact I didn't even have to buy fabric for the chair, I used an old cream lined curtain that was lying around and dyed it a soft pink colour!
I am sure that many of us have an old chair hidden away somewhere with a death sentence waiting to be passed. Perhaps a chair that was passed down to you and you just cannot bear to part with, or an old chair that you want to use elsewhere in the home and are just waiting for the time and the know how to recover.
YOU WILL NEED:
Cotton fabric is ideal if you want to be able to wash the cover
Nylon lining
Sewing machine and sewing accessories
Fabric dye
Bosch Tacker or heavy-duty stapler
Optional:
Rust-Oleum paint pens
CONTINUES BELOW
HERE'S HOW:
1. Clean up the chair as much as possible and make any repairs. In this project one of the springs had broken off and I used an angle grinder to cut off the end, stretch and reinsert the spring.
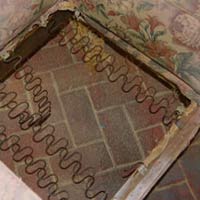
Note: If springs are missing or too damaged you may need to replace these with nylon strapping that you can find at most fabric stores.
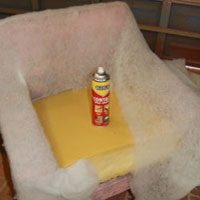
2. Use batting and contact adhesive to cover up the chair. I also cut a new piece of sponge for the chair seat. The contact adhesive helps to keep the batting in position as you work on the chair. Alcolin spray contact adhesive or Bostik spray adhesive are perfect for this.
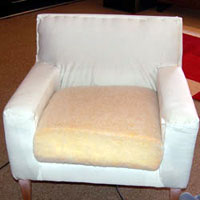
3. The entire chair was covered in a nylon lining fabric. Use the Bosch Tacker or stapler to fasten the fabric under and around the chair for a neat finish. Nylon is the best fabric to use as it allows the covering fabric to be fitted and removed easily.
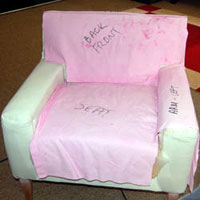
4. Arrange the cotton fabric and cut out each section piece by piece, remembering to allow a 2cm seam allowance on all edges. Cut each section one at a time and then rearrange the fabric to cut out the next piece.

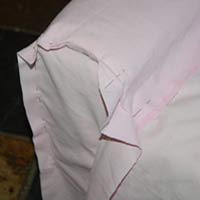
5. Once all the individual pieces have been cut out, place these face down onto the chair and pin the sections together as close as possible to the chair itself. You will find it easier to pin small sections together and sew these before continuing. For example: Pin the back and sides together, sew and then add the seat, then the arms, and so on. Finish of all edges with a zig-zag stitch to prevent frays.
DIY Tip:
Test fit each section as you sew together so that you can adjust where necessary.
Optional:
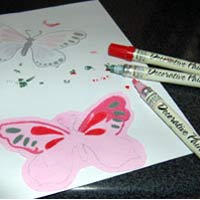
To finish off I painted butterflies and flowers onto scrap pieces of fabric using Rust-Oleum Paint Pens. This paint doesn't wash out and adds a nice decorative touch to the chair. Each patch was attached using a zig-zag stitch.