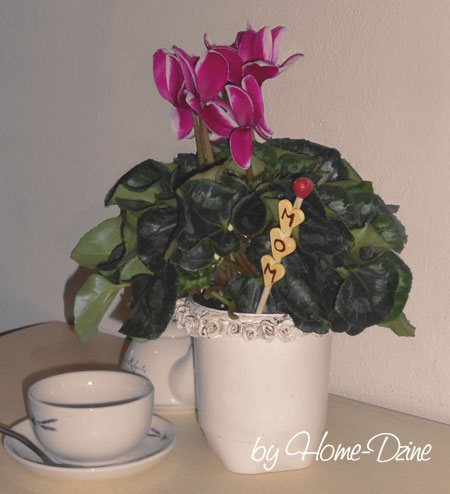
Flower Pot from Yoghurt Container
Before throwing anything away these days, I try to think of ways items can be upcycled, reused and repurposed. This time it's a yoghurt container that is upcycled into a vintage flower pot.
1. A large yoghurt container can be transformed into a flower pot with very little effort and just a dab of creativity. But before you start, remove the plastic label and then sand the container with 220-grit sandpaper. This will ensure that paint will stick better to the surface.
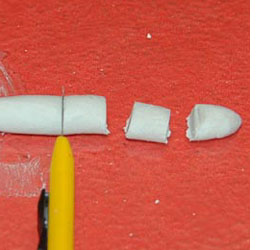
2. I'm using jovi/das air-drying clay for my project. I prefer air-drying clay as opposed to oven-drying, mainly because it dries on its own. Condition the clay by kneading until soft and then roll into a long thin sausage of about 5mm in diameter. Cut the sausage into 5mm long sections.
CONTINUES BELOW
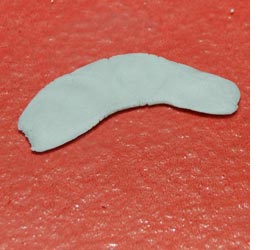
3. Use your finger and thumb to squash one section flat. Try to make it as thin as possible, but not so thin that it breaks apart easily. It still needs to be pliable enough to work with. Try to squeeze one end narrow for starting your clay rose.
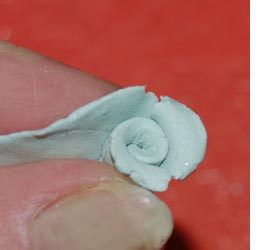
4. Starting at the narrow end, start to roll up. The idea is to use the tip of a finger to gently fold over the top as you roll to create the petals. You might not get it right the first time, but as you practice it becomes very easy to do.
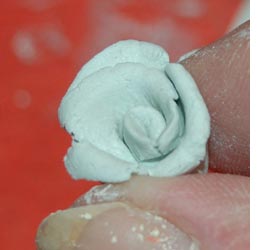
Your completed clay rose should look something like this. The centre should be tight and the surrounding petals more loose, with the tips bent over. Continue to make enough roses to fill around the top of the yoghurt container. I like to make a selection of large and small roses to slightly vary the pattern. Put all your completed roses aside for them to dry.
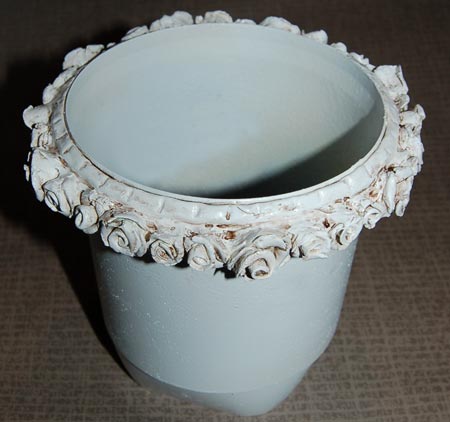
5. I sprayed the yoghurt container with Rust-Oleum Universal spray, but changed my mind once done. I think I want to go with an off-white colour rather than a dark colour - so ignore the painted container! Apply a small bead of No More Nails adhesive around the top rim of the yoghurt container.
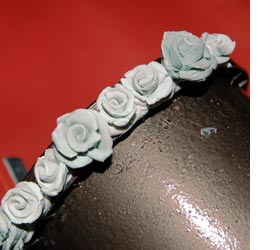
6. Start to affix the completed clay roses around the top of the yoghurt containing by pushing them down into the bead of No More Nails. Space them closely together so there are no gaps.
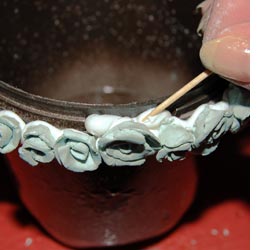
7. Squeeze out a blob of No More Nails onto a piece of card and use a toothpick to apply around the top and fill in any gaps. This will ensure the roses are securely and firmly fixed to the container. An ear bud comes in handy for smoothing this out - make the tip wet for easier smoothing.
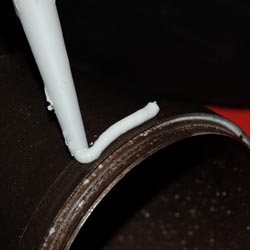
8. Apply a blob of No More Nails to spots around the top of the container.
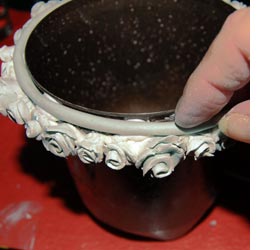
9. Roll out a long sausage of clay - long enough to fit around the top of the container - and gently push down. This adds a nice finishing touch to the design.
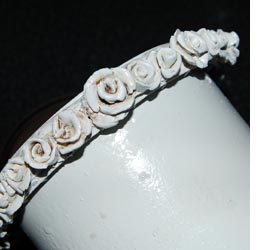
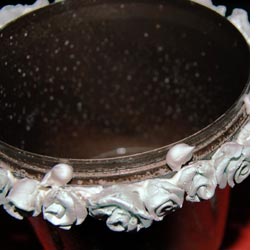
10. After leaving the clay overnight to dry, I sprayed with Rust-Oleum 2X blossom white. To add a vintage effect to the roses, I watered down dark brown paint and dabbed this into the flowers and around the border with a small paintbrush and then used a lightly damp sponge to remove excess paint. You can do this after much as you like, depending on the effect you want to achieve.