
How to paint and distress old furniture
I love discovering old piece of furniture that can be painted and distressed, especially when you pick them up for practically nothing because people don't want them anymore. But even searching online classified can sometimes result in finding hidden treasures, or vintage pieces that haven't been cared for.
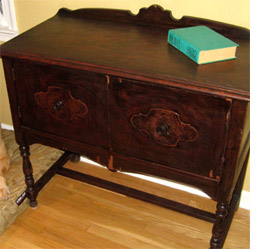
This project is by Nancy on artsy chicks rule but it's a good example of how ugly furniture that is transformed into a beautiful piece you can be proud to have on display. I have had to make quite a few substitutions for products that aren't available here, but you will still achieve exactly the same look.
Before even thinking about painting, give the surface of the piece a sanding with 120- and then 180-grit sandpaper. More often than not you will find these pieces are covered with layer upon layer of wax furniture polish, and you can't paint over that. If you find that sandpaper doesn't take off the wax, grab yourself a heat gun to melt off as much as you can. Click here for tips on using a heat gun to remove excess varnish, paint or wax.
Wipe clean before you apply a coat of Plascon Wood Primer. This will seal the wood and provide a strong bond between wood and paint. Although the primer is pink, don't worry about this for the time being. Let the primer dry as recommended.
CONTINUES BELOW
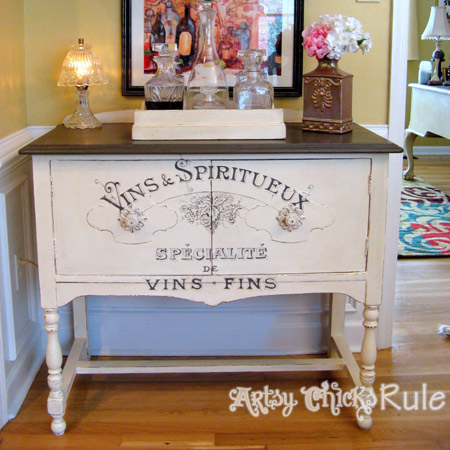
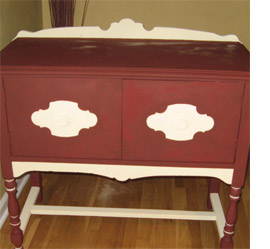
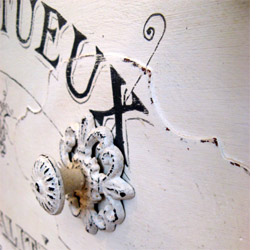
Apply two coats of Plascon Polvin acrylic matt in a deep red or deep brown and follow this up with two coats of Plascon Polvin in an off-white colour. I like to use Ivory Snow (Y3-C2-3) for most off-white painting projects. Alternatively, you can use a Rust-Oleum Distressed Ivory kit, which contains everything you need for top coating and painting on the design.
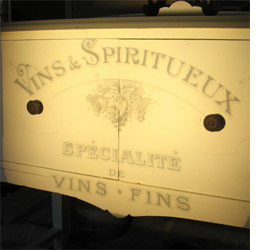
Now you'll need to beg, borrow or hire an overhead projector so that you can print out a design onto a transparency and reflect this onto the front of the cabinet to trace the design. You can hire an overhead projector for around R250 for the day.
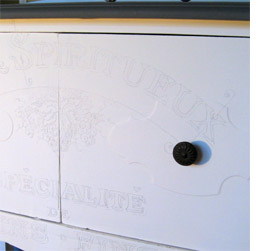
Use a soft pencil to go over the projected design to transfer onto the front of the cabinet and make it easy for you to paint in the details.
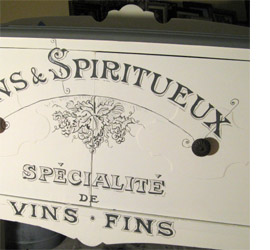
Use black acrylic craft paint and an artist's paintbrush to paint on the design - following your drawn lines. If you are using a Rust-Oleum Distressed Ivory kit, simply use the top coat provided in the kit.
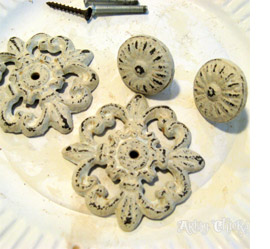
You will also need to paint the handles and can find more details here on the various options for painting handles and knobs. Once painted, scuff them up with 120-grit sandpaper until you are happy with the look to match your furniture.
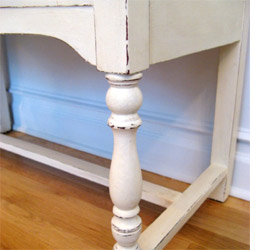
Before re-attaching handles or knobs you need to distress your project. Use a 80-grit sandpaper and a fine sanding sponge to scuff on the edges and any detailed areas. You don't want to right down to the wood, just enough to show the red or brown colour below. Use the 80-grit first and then rub over with the sanding sponge to smooth down. If using the Rust-Oleum Distressed Ivory kit, the kit includes a buffing sponge for you to use.
artsychicksrule.com
Apply a light coat of Woodoc antique wax over the surface and buff before re-attaching the handles and hardware to finish off.