
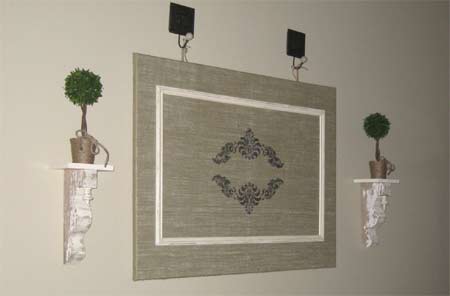
Topiary shelves
If you are lucky enough to discover an old set of corbels, or find a nice pair of shelf brackets, here's a lovely project.
songbirdisnesting.com
YOU WILL NEED:
Corbels or shelf brackets
Wood for shelf top
Ponal wood glue
Masking tape
Topiaries
Jute or thick string
Scissors
Dremel glue gun and glue sticks
Rust-Oleum 2X Painters Touch - Heirloom White
CONTINUES BELOW
Here's how:
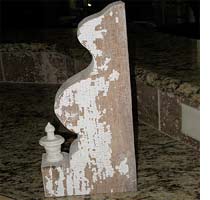
1. You can leave the corbels as you find them, or sand them down and spray them white with Rust-Oleum 2X Painters Touch.
If you are using ready made pine brackets, or making your own, you can easily distress and age them by applying Rust-Oleum 2X Painters Touch and then roughing them up with 60-grit sandpaper.
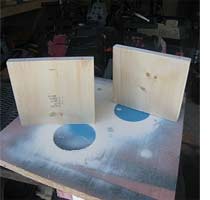
2. Place the corbel or bracket against the underside of the shelf top and mark around with a pencil. Mask off this area as you do not want to paint it. In a well-ventilated space, spray the top and bottom of the shelves with Rust-Oleum 2X Painters Touch. Remove the masking tape before the paint dries. Leave to dry.
3. Place the shelf face down on a level surface. Apply wood glue to the masked off area of the shelf and position the corbel or bracket on the wood glue. Leave to dry.
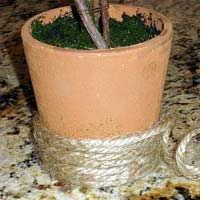
4. While waiting for the glue to dry, start wrapping jute or string around the topiary pots. Apply a blob of hot glue at the starting point, wrap up around the pot and finish off with a blob of hot glue at the end.
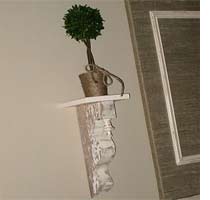
5. Mount the shelf on the wall and top off with your finished topiary.
DIY Tip
The easiest way to mount a corbel is to drill into the back and fit a keyhole bracket, which then fits onto the wall plug and screw head in the wall.