
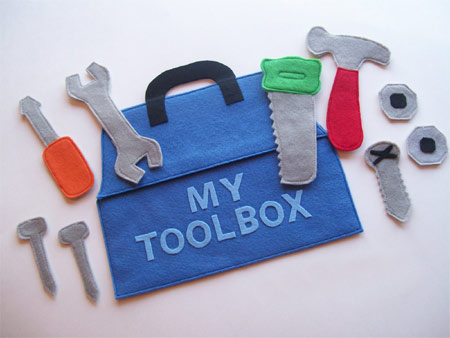
DIY Kids own toolbox
Does your little guy like to get handy around the house? Here's a way that he can help you with everyday DIY - with his very own toolbox! It's also a fun travelling toy that's easy to play with and easy to pack away when not in use.
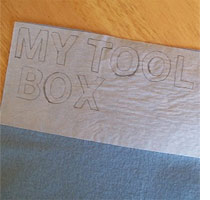
1. Before you start cutting out the felt letters, iron on a strip of fusible webbing (available at your local fabric shop). It stiffens the felt and makes it far easier to cut neat edges. Leave the backing strip on at this stage. DO use a cloth
Be sure to trace your letters backward though. You'll notice I didn't. Oops. Luckily the only letter I had to redo was the "L".
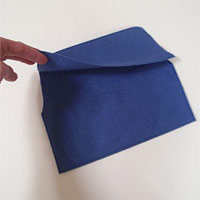
2. Cut out the toolbox - nothing fancy here. You'll want a back piece and then two pieces in the front to make a pocket for your tools.
CONTINUES BELOW
3. Sew down the sides to attach the lower front, and along the top for the flap.

4. Arrange the cut out letters on the front of the tool box. Peel off the backing from the iron-on fusible webbing, place them on the toolbox and iron on - again using a cloth over the surface to prevent the iron from damaging the felt.
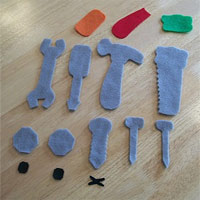
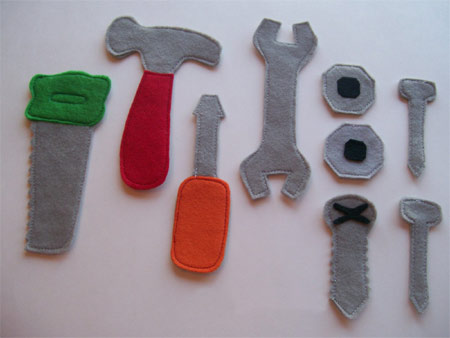
5. Cut out the tools from grey felt. To make them sturdier, cut two of the grey. Everything else you can cut one of.
6.Match the tools together and sew around the edges to give them a finished look.
DIY Tip
If you don't have a sewing machine you can also use fusible webbing to fuse your pieces together with an iron. Very simple.
pinklemonadedesign.blogspot.com