
Makeover an antique table
Sometimes older pieces cry out for a bit of TLC to restore them to stunning collectibles. Here's how to create a rustic finish on a wooden side table using paint and a distressing technique.
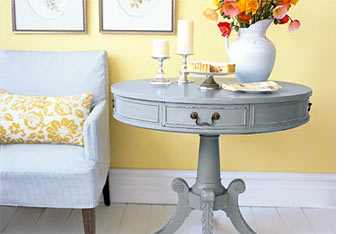
With a new coat of paint and a little sandpaper treatment, battered finds can acquire fresh character and tired, familiar furniture pieces gain new life. The process offers the twin appeal of ageing and renewal, and can be applied to any piece of timber furniture, including cheap pine - shabby chic!
The process we used to revamp our table is simple, and can be carried out in just one weekend. The trick is to be bold with colour while making sure to choose tones that will work with your interior. Take inspiration from accessories in the room, such as cushions or artwork.
Painting pieces can also be an inexpensive alternative to full restoration. In our case, we could have French polished the table, but this would be time-consuming to do at home and expensive to have done professionally. Dark timber pieces can often look too heavy in modern homes, but our chosen rustic look suits many different kinds of interiors, and works to lighten the look and tone of a piece.
The added beauty is that you don't have to be precious: if you don't like, or else tire, of the result, you can simply repaint.
CONTINUES BELOW
YOU WILL NEED:
Drop-sheet
Sugar soap
Three different grades of sandpaper (100 grit, 180 grit, 400 grit)
Cork or sponge sanding block
Masking tape
Universal undercoat
Matt acrylic paint
Paint brushes (at least one 25mm brush)
Waterbased acrylic sealer, matt
HERE'S HOW:
1. Place your furniture on a drop-sheet. Sand the piece back with 100 grit sandpaper. If the surface was previously varnished or painted with enamel paint you will need to remove as much of the gloss as possible. Wash the surface well, using sugar soap, then allow to dry. Cover any areas you don't want to get paint on (such as drawer handles) with tape. Apply two coats of undercoat then sand back.
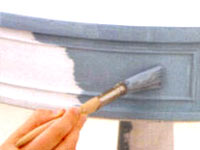
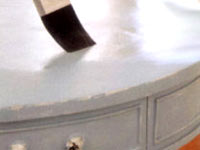
2. Start painting with your chosen colour and apply with a 25mm brush, using cross-hatch strokes. After the first coat, allow paint to dry completely then lightly sand back with 180 grit sandpaper, to remove ridges formed by brush strokes. Apply a second coat.
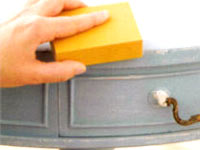
3. When the second coat of paint is completely dry, give the table a light sand with 400 grit sandpaper. We alternated between the 180 and 400 grit sandpapers for the final stage, until the desired aged look was achieved. Use small pieces of sandpaper to concentrate on the edges, curves and details of the furniture. Sand evenly to reveal the white undercoat and some of the timber.
4. Wipe table down with a clean cloth then apply two coats of matt sealer for protection. Be sure to allow enough time for the sealer to dry in between coats – six hours should be enough.