
Create your own fun, carved stamps
Rubber stamping is the latest trend for adding unique touches to a wall, border, fabric, furniture - in fact you can stamp onto almost anything! It's fun, it's easy and it's definitely a fun way to add your own personal touch.

After a couple of practice rounds you can be carving your first stamps - that's how easy it is.
CONTINUES BELOW
HERE'S HOW:
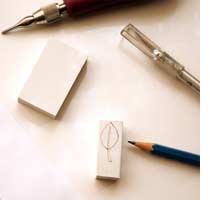
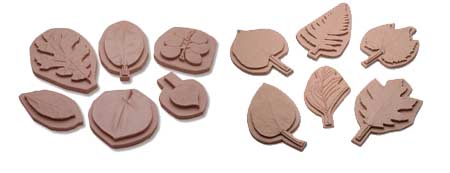
Staedtler erasers or Mastercarve are perfect for making your own stamps for craft and decorative stamping. Use a pencil to outline your design onto the eraser or Mastercarve. Darken the lines with a pencil or pen so that you can more easily see what you are doing. You can use a fine-tipped craft knife or a specialty carving pen to carve out your design - only carving out those areas that are not part of the design.
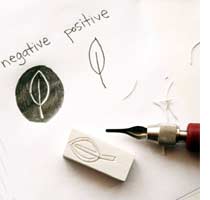
The cuts don’t have to be very deep - just deep enough to keep ink from being transferred to the paper when you stamp. Once you have made your cuts, test your new stamp and make adjustments as necessary. You can use a cushioned nail files to smooth rough edges. Once you are satisfied with your stamp, use contact adhesive to glue it onto a piece of board slightly larger than the size of the stamp.
Use can use Rust-Oleum Paint Pens to apply paint to your stamps, or use a stamp pad (available from craft and hobby shops). Make sure that the paint is applied evenly and try not to apply too much to the stamp at once. It's much easier to fill in blank or lightly painted spaces than it is to remove excess paint.
Get creative
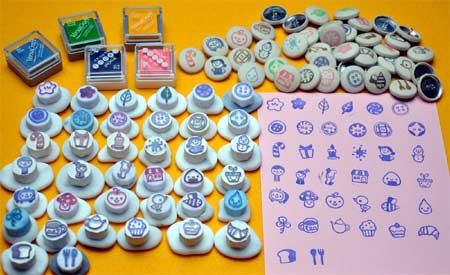
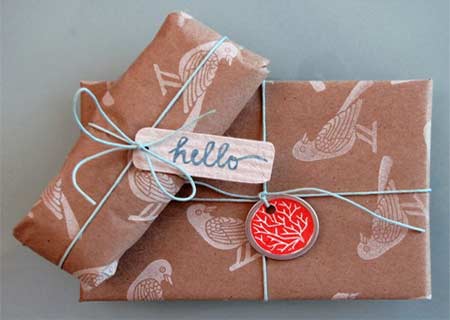
You can use your stamps for personalised writing paper, wrapping paper, scrapbooking, gift cards and even stamping onto fabric. Stamp your walls, create elegant decorative borders or decorate a child's room with stamps that he or she has helped create.
As you practice you will be able to create intricate designs in almost any theme, for any project.
blogdelanine.blogspot.com