
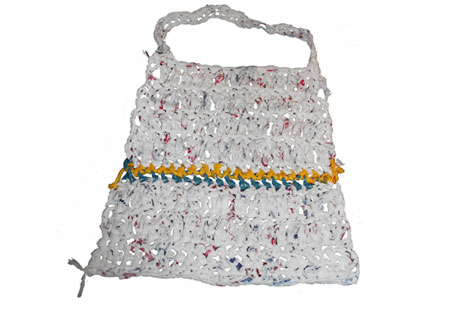
Shopping bag made of... plastic shopping bags!
Just finished my new plastic shopping bag made from old plastic shopping bags! I recently posted a project using my DIY super-large crochet hook and the whole idea behind designing the hook was to be able to make a shopping bag with plastic bags.

Not being very good at crochet (seriously), the entire bag is made using very basic stitches. In fact, I am sure that many avid crocheters out there will be in stitches when they see how I made my shopping bag! Having said that, there's no excuses for making use of all your plastic shopping bags that are stuffed away somewhere out of sight.
You will need about 70 - 80 bags to make this shopping bag, and it's nice to incorporate different coloured plastic bags as well.
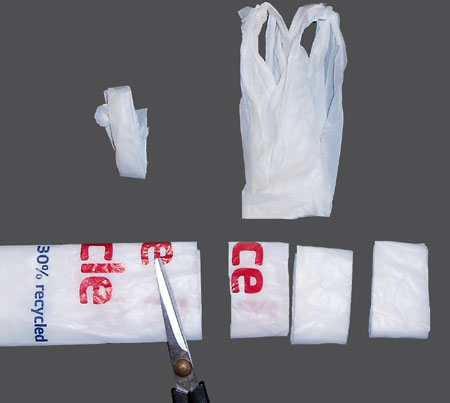
1. Top and tail
Gather together all your plastic shopping bags and use a pair of scissors to top and tail them. Cut off the tops and at least 1cm at the bottom. The remaining part can be cut into strips 3cm wide.
2. Join the bags
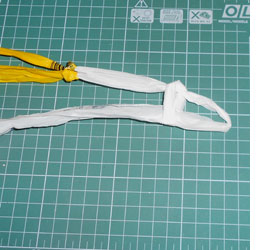
For the purpose of demonstration I have used a yellow and white bag to show how to join all the bags together. Place the end of one bag (white) over the other bag (yellow).
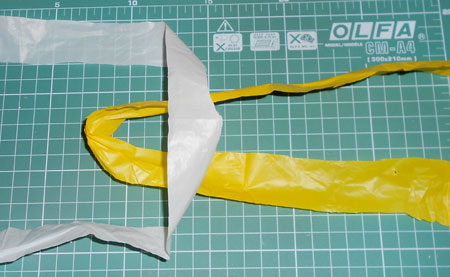
Take the bottom of the yellow bag over the top of the white bag and through the yellow hoop that you see in the image above.
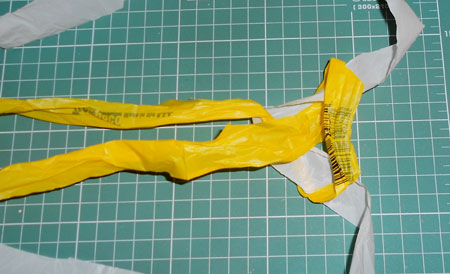
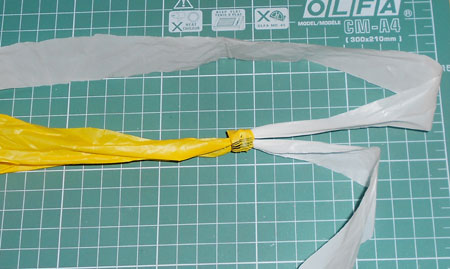
Grab the tails of both bags and pull gently in opposite directions. Repeat this to join several bags together to create a long length of plastic.
3. Start your stitches
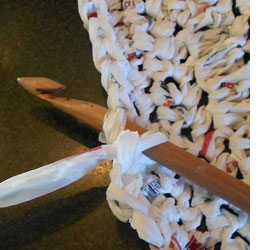
Make a loop at one end, leaving a tail about 10cm long.
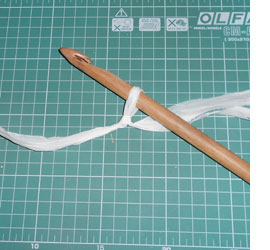
Place your super-large crochet hook through the loop that you made and gently pull on the plastic to tighten the loop around the crochet hook. Not too tight - it should have just a slight looseness.
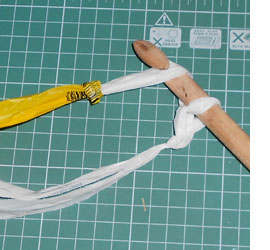
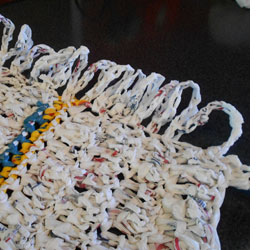
To add the first stitch (after the loop), wrap the plastic around the hook.

Pull the hook through the loop to add the first stitch. Ignore the yellow plastic as you will have a long row of white or whatever colour you are using. Continue to add stitches in this way until you have a chain that is 30 stitches long. This is the total number required for the width of the bag.
CONTINUES BELOW
4. Make the front and handles
Use a basic chain stitch to make the front section of the bag. As you reach the top you can start to make another chain for the handle, reversing back again so that it has a double chain. I made it this way because I want to make the bag as strong as possible and try to create the shape without any sewing.
5. Add the sides
On the completed front section of the bag I added a looped chain stitch on both sides. When I add the back section, this looped chain will be incorporated to make the sides.
6. Add the bottom
Working on the back of the front, I did a reverse chain stitch to make the stitches bend inwards. To do this put the bag face down as opposed to having it face you. I wasn't sure if this would work, but it did. Once you reach the width for the base, which is about 10cm, you can revert to normal chain stitches to complete the back.
As you work up towards the top, incorporate the side loops as you work up the rows. Finish off by making the handle in exactly the same way as you did for the front. This design creates a strong, almost all-in-one bag that is extra sturdy and strong enough to handle daily shopping excursions.
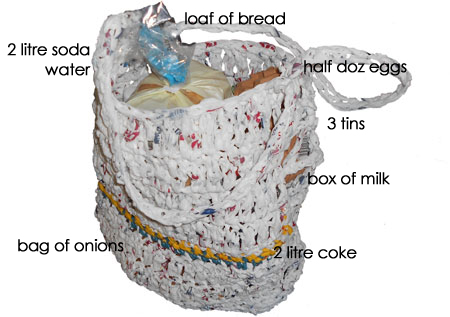
Update on my plastic shopping bag: Just went for a quick shop and managed to pack in 2 x 2 litre bottles cold drink, 1 bag onions, 3 tins, 1 litre boxed mil, half dozen eggs and a loaf of bread. Still had room for more!