
Transform an old table
Transform any old table into a photographic gallery of all your favourite moments. Linda Strauss takes you step-by-step through the project.
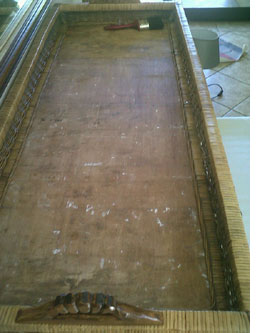
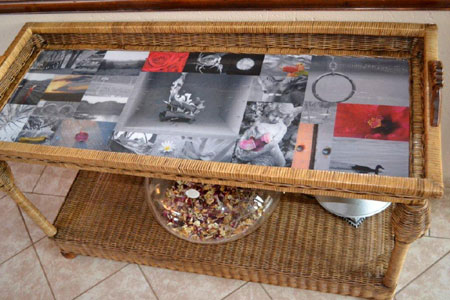
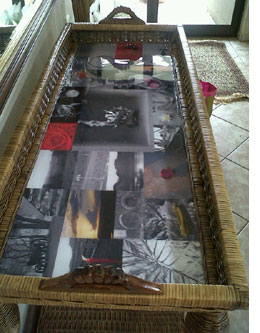
I bought the cane table about 9 years ago, and although it is still in pretty good nick, the surface of the table had started peeling away. The surface was covered in a very thin bark or possibly even a leaf of some sort. I decided to peel this away and replace it with photos that I took (and all of them had some kind of meaning) and then put a layer of liquid glass over the photos to protect them.
YOU WILL NEED:
Photos/pictures of your choice (I had mine printed on wallpaper at my local printer, as I found that normal printing paper was too thin and cardboard too thick)
CorelDraw or software of your choice (I used CorelDraw to size the pictures and place them in a collage according to the size of my table top. Printing it to the correct size on wallpaper was just easier to work with than individual images)
Wallpaper glue
Sandpaper
HERE'S HOW:
1. Remove the bark and sand down the surface with 180-grit sandpaper.
2. Apply wallpaper paste to the back of the wallpaper (or your images) and position nicely, ensuring that it is smooth and straight. Use a lightly damp sponge to gently rub from the centre of the paper out to the edges to remove any air bubbles and leave to dry overnight.
3. Mix the liquid glass according to instructions and pour it over the wallpaper image ensuring an even coverage. I used an ice cream stick to smooth the liquid glass over the surface and to get it into the corners.
Allow the liquid glass to dry for at least 24 hours.
DIY Tip:
If any bubbles occur, lightly blow on the surface and you will see the bubble pop (make sure to do this before it sets)
4. Because there were a few gaps here and there, I chose to add another layer of liquid glass over the first layer.
5. To finish it off nicely, I use a polyurethane varnish on the cane to give it a new fresh look.