
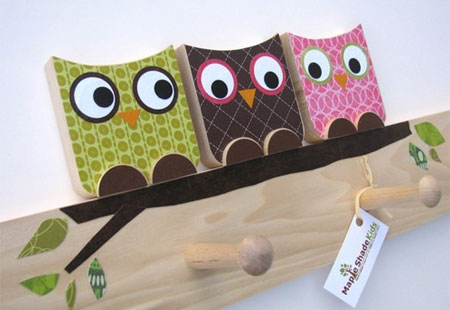
Make these cute wooden owls
These wooden owls would look gorgeous on top of a bookshelf, or on display in a child's bedroom or nursery. You can so easily decorate the wooden owls with any fabric or wrapping paper to coordinate and match existing decor.
One Project Closer saw these beautiful wooden owls on Etsy and loved them, but they were so expensive. So, when one of her best friends was having her baby shower, she decided to try and make them.
This ended up being a much simpler project than expected and it turned out to be a favorite too. One thing about this project was that I used supplies I already had on hand – even the wood was off cuts from an earlier project.
oneprojectcloser.com
YOU WILL NEED:
Laminated pine (or you can use SupaWood)
Scrapbook paper, wrapping paper or fabric
Mod Podge or clear acrylic sealer
Jigsaw
180-grit sandpaper
Craft knife
Sponge applicator
Rust-Oleum clear polyurethane spray varnish
HERE'S HOW:
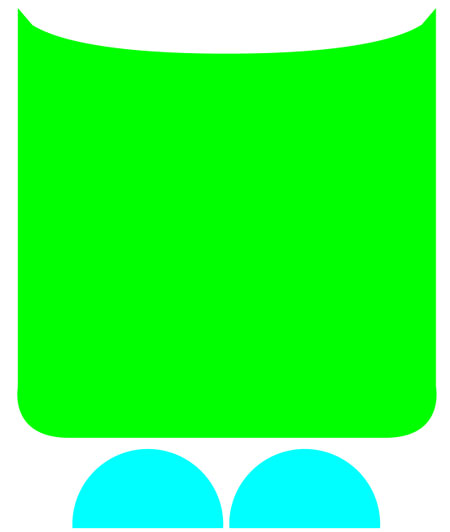
1. We made stencils for the owls, feet, eyes and beak, so all you need to do is print them out and cut them!
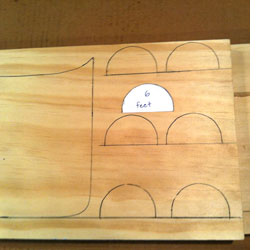
2. Trace the owl and its feet onto wood. The wood we used worked really well to create a heavier owl that sits well on shelves. However, a thinner owl would go great above a door frame. Whatever wood you choose, make sure it is decent quality and can be sanded to look pretty. Cut out the shapes using a jigsaw. Use a fresh blade and go slow, cutting away tiny pieces to make it easier.
Be sure and wear gloves and eye wear for protection! This was the most time-consuming step for me because I hand-sanded the owls and feet, first starting with a 80-grit sandpaper then using 240-grit to create more polish. You can also use a multi-sander. After sanding, wipe the wood down with a damp cloth to remove any sawdust.
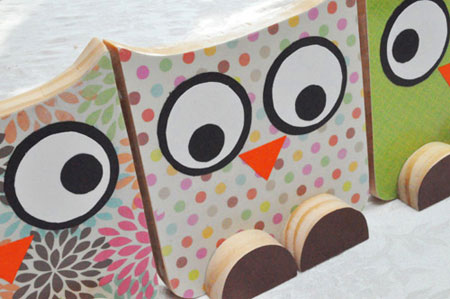
Choosing your paper is really what makes these owls unique!
Patterns and shapes create a lot of interest, but be careful not to use too large or busy of a print or it will detract from the owl. Using pastels will create more of a child-like feel, but darker colours and metallics will make them more appropriate for adult decor.
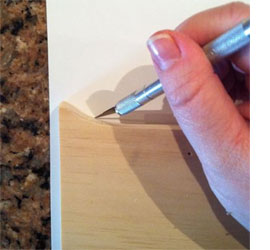
3. On a cutting board (or an old magazine if you don’t have anything else), place the owl face down on your paper or fabric and trace the outside edge of the owl with the craft knife. Apply a good amount of pressure as you go, otherwise you may need to re-trace the owl. Ideally, you will completely cut the paper to the exact size of the owl.
It is important to do this with each individual owl and foot because even though you used a stencil, each piece will be slightly different, and you want your paper to be the exact size of the owl. I originally tried tracing on the paper with a pen and then cutting it out, but it was not precise enough.
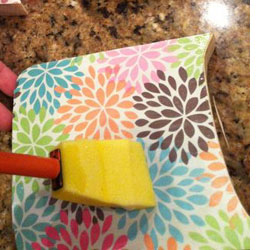
4. This was the fun and quick part for me. Using Mod Podge and a sponge brush, apply a decent coat to the front of the wooden owl. Then, place the paper or fabric on the owl starting on a corner and slowly pressing down while working your way across the owl. Press down the paper, even moving it around a bit to make sure the entire surface between the wood and paper is coated in Mod Podge and to ensure there are no air bubbles.
5. Apply another coat of Mod Podge on top of the paper. Again, check for air bubbles. You may need to use a hard, flat surface to run along the owl to push out any bubbles. Apply two coats of Mod Podge in total, allowing it to dry in between coats. Use this same process for the owl feet.
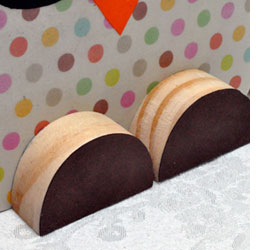
6. Since these are really just decorative pieces, I used Bostik clear adhesive to affix the feet to the owl. Once in place but still wet, stand the owl up to make sure she stands straight. I purposefully glued the feet first so that you can space the eyes and beak correctly in relation to the feet.
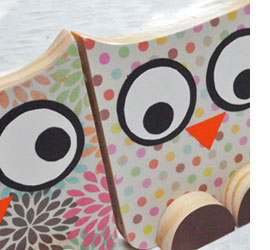
7. Once the feet are dry, place the eyes and beak on the owl and figure out the spacing before you glue. Then, starting with the largest black circles, Mod Podge them to the owl using two thin coats and dabbing the brush rather than wiping. This is important because the black ink from the paper can run onto the owl, so be careful and make sure and let your Mod Podge completely dry in between coats.
Repeat this process with the medium white circles, small black circles, and beak, in that order. The small black circles can be placed off-centre (left, right, up, down, diagonal) within the whites of the eyes to give the illusion of the owl looking in a specific direction.
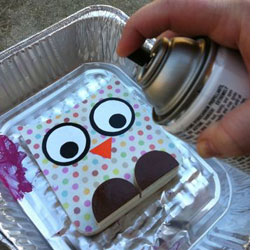
8. Mod Podge leaves a matte finish on the owls, so I used Rust-Oleum polyurethane spray varnish to seal the owl and create a slight sheen and a much more polished look. Remember to sign the back of your owl or write a personalized message on the back before spraying the lacquer. As with most spray paint and lacquers, it is best to apply 2 -3 thin coats in a well-ventilated area.