
Make your own candles
Whether it's for a special event or celebration, for the festive season, or just so you don't get left in the dark when Eskom switches off the power, making your own candles will save you bucks and decorate your home with atmosphere and light.
If you have never made your own candles before you will discover a therapeutic craft that will not only save you money, but that can be quite addictive once you start. In this project you can use stiff silicone tubing, or even PVC pipes to make your own candles for the holiday table - or for those emergency situations when Eskom decides it's time to cut off your power!
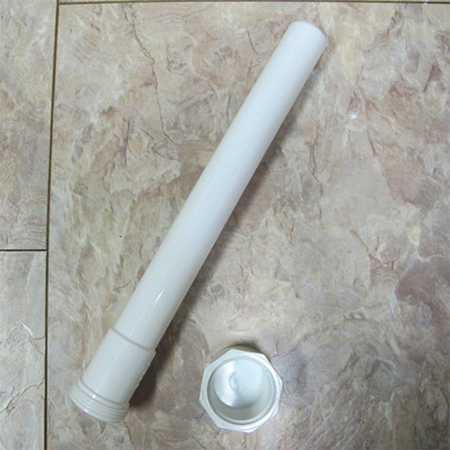
As a mould for your candles you can use stiff silicone tubing that can be cut with a craft knife once set, or you can use PVC pipes and use a Dremel Multitool and cutting disk to make removing the mould easy. Both will need to have end caps. The silicone tube needs to be stiff enough to stand upright to form a straight candle.
Apart from the mould you will also need a few supplies: wicks with long strings, metal wick tabs, soy or paraffin candle making wax, needle nose pliers and a double-boiler for melting the wax.
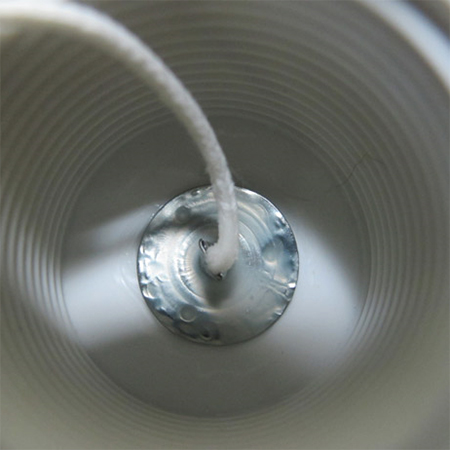
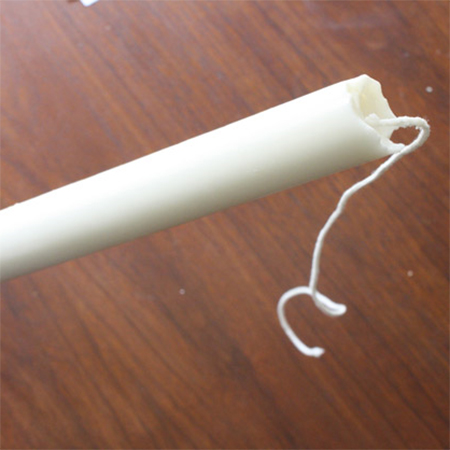
1. Measure and cut the wick string to the length of your mould - allowing an extra 10 centimetres so that the string can be cut for a nice wick at the end of the candle.
2. Pinch the metal wick tab to the string. Dip the bottom into some melted wax to secure this onto the bottom of your mould or end cap.

3. Place the wax flakes in a double-boiler and melt on low heat.
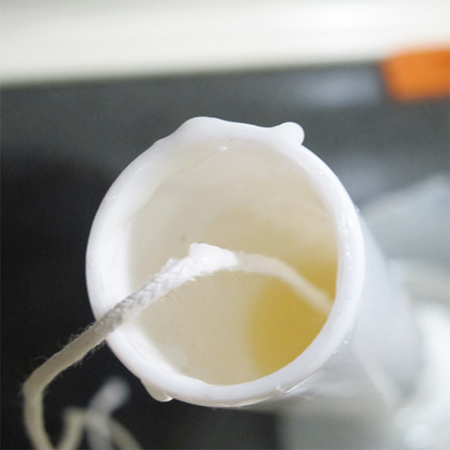
4. Use a baster or large syringe to transfer melted wax into the tube or pipe mould.
GOOD TO KNOW
As you fill the mould make sure the string wick stays centred and taut.
You can use pliers to hold the wick for a few minutes as the wax cools
and starts to set.
GOOD TO KNOW
You need a system that allows you to keep the tubes or pipes upright
while the wax cools. If you plan on making lots of candles, make a frame
using PAR pine and cut holes in this using a spade bit or hole saw. A
more temporary solution could be made using a cardboard box with holes
cut in for holding the tubes or pipes upright.
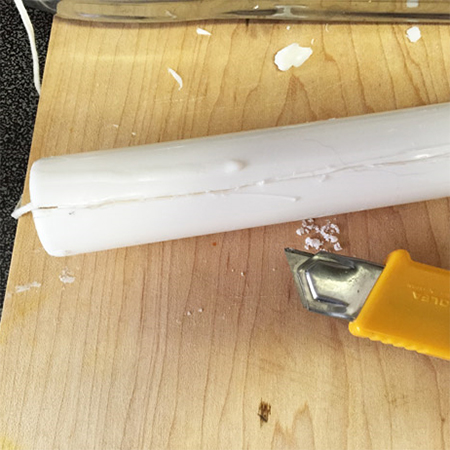
5. Once the wax is set you can unscrew or cut off the end cap. Sometimes you are lucky and the candle slides out easily, but more often than not you will either need to cut away the tube or pipe.
GOOD TO KNOW
You can easily fix any scratches in the candle by lighting a match and
gently running over the scratches.
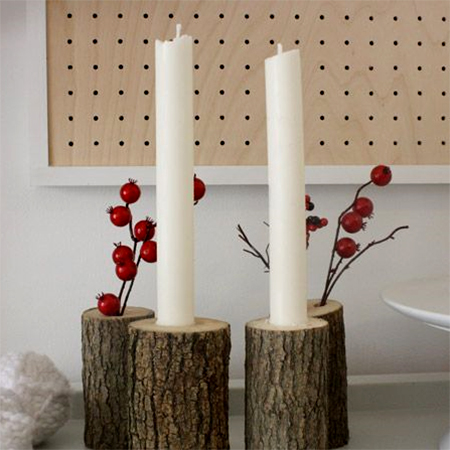
6. Use a suitably sized spade bit to drill holes in cut branches to make decorative holders for your new candles.
