
How to make a gift box
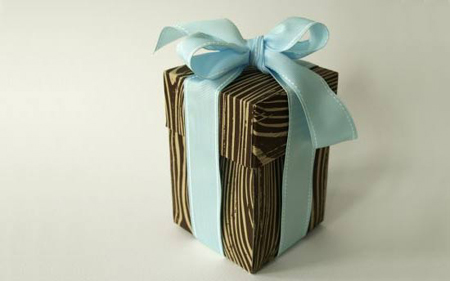
We've all seen it at one time or another: a child opens a beautifully wrapped gift and ends up playing with the box and the wrapping much more than the toy it contained. In this project find out how to make the perfect gift box.
craftstylish.com
HERE'S HOW:
Download the diagram for the Box Top and Box Bottom.
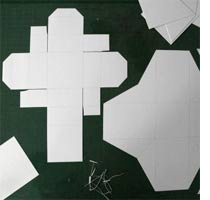
1. Begin by cutting your templates from a medium-weight card. I suggest drawing all of the score and fold lines on both sides of your templates, especially if you plan on covering your box with a wrapping paper.
2. I used double-sided adhesive sheets to affix my decorative papers to my box. Because of the design of the wrapping paper, and to create the wood grain effect it was necessary for me to trim to fit the areas of the box and then carefully press into position.
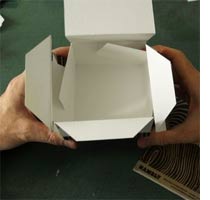
3. Once the exterior of your box is decorated, turn the model over and score the back as indicated in the template. Using a straightedge as a guide, gently fold and crease your model as indicated by your score marks: The sides of the model fold UPWARD; the corner pleats fold INWARD.
4. As with the bottom of the box, score the inside of the box top and precrease and prefold the components as indicated.
5. Assembly of the box top is simple: Fold all sides upward, fold all flaps inward, and then fold the tops of all the sides down (over the flaps) to lock them in place.
6. When all three sides are folding inward, fold in the fourth and final side (the long one). This final piece covers all of the mitered pieces inside the box top and holds them in place.
7. Depending on the weight of the card you use, you may need to trim slightly this final piece to assure that it lies squarely in place.
The finished box top looks great, is structurally sound and quite sturdy, and will wear well through years of use.