
Frosted glass tree design
I am busy preparing for the workshops for Grand Designs Live at the Coca Cola Dome from 25 to 27 May 2012. One of the workshops will be to look at different ways to make picture frames and I wanted a nice framed project to show everyone.
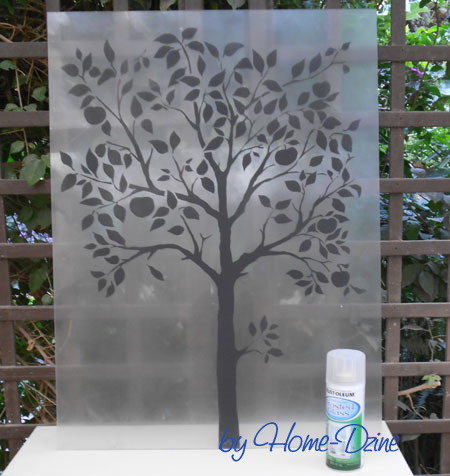
I noticed a piece of glass lying in the workshop and thought it would be nice to do a frosted glass piece that I am going to frame for outside my entrance. The idea for this came right off the top of my head and had no idea if it would work or not, but as you can see it came out very nice.
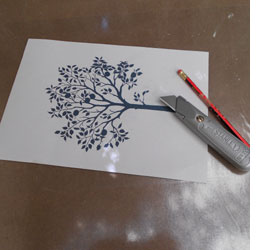
1. I found a nice tree design on the Internet. It's quite detailed, but not overly so. You will also need a sharp craft knife and a black permanent marker. I tried using a pencil but it was difficult to see my drawn design.
2. I covered the glass with clear self-adhesive vinyl and then, using my printed picture as a guide, I roughly drew the tree onto the top of the vinyl with a black marker. If you make a mistake you can always rub off with some methylated spirits.
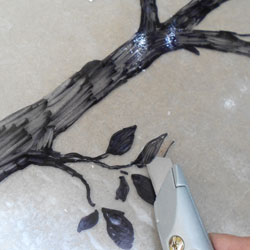
3. Now it's time to cut out the design with a sharp craft knife. This part requires some concentration so that you cut nicely to create a perfect outline.
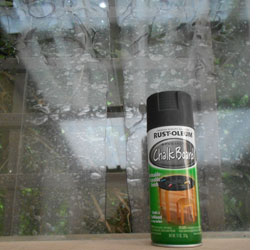
4. After finishing the cutting (hard to see on the image) I placed the glass upright to apply a light coat of Rust-Oleum Chalkboard spray. Why chalkboard you ask... I want a nice flat image for the finished result.
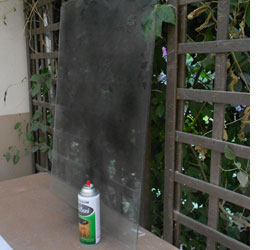
I did actually apply two light coats to achieve the final result. It's better to stand back quite a bit for a soft spray effect - at least half a metre away from the surface.
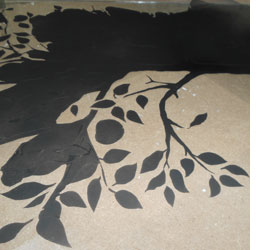
5. After letting the paint dry for about half an hour I started to carefully peel away the vinyl.
6. Make sure you remove all small pieces of vinyl before you stand the glass upright to apply a light coat of Rust-Oleum Frosted Glass spray to the surface.