
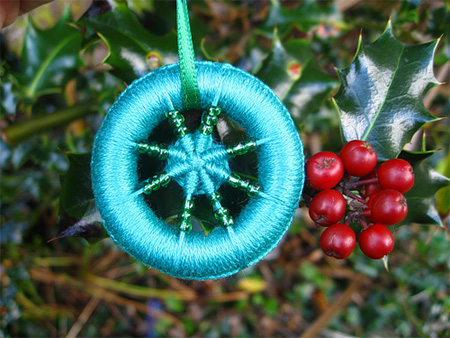
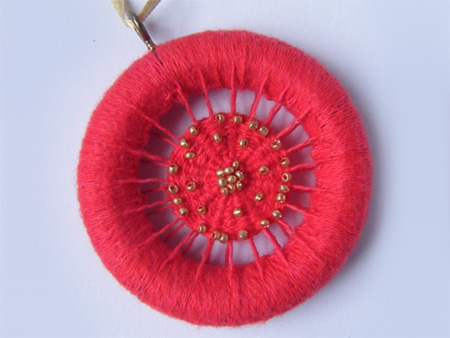
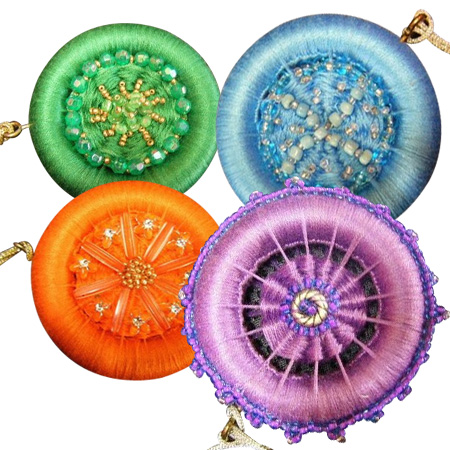
Make your own Christmas tree ornaments
A few curtain hoops, some colourful, jewel-toned embroidery thread and a few sewing accessories are all that you need to make these gorgeous tree decorations.
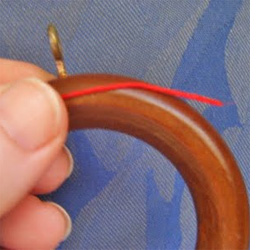
Step 1
Unravel the skein so the thread pulls freely. Hold the tail of the thread as in the picture.
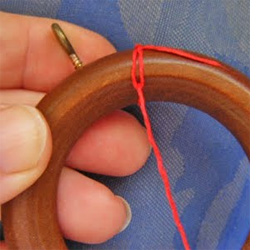
Step 2
Make a loop over the tail of the thread. Pull the remaining thread through the loop (imagine a button hole or blanket stitch).
Step 3
Pull the knot firmly capturing the tail of the thread securely.
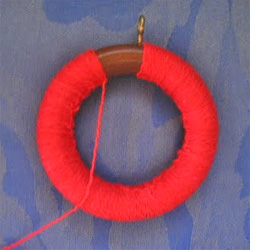
Step 4
Repeat this step a few times and then cut off the excess tail. Repeat this process until the ring is almost completely covered. Make sure that you roll the 'knot' to the inside.
Step 5
Now we are going to make the spokes. Thread the needle with the same thread before starting this step, as its easier than stopping and doing later.
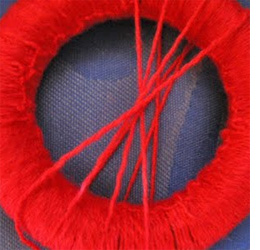
Step 6
Wind the thread around the outside of the ring, down the front side, around the back. You need to be careful here that the point where the threads cross on the top is centred. Ignore the back for the time being. You need to finish off with an odd number in the centre section.
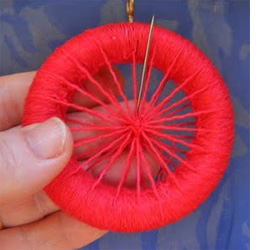
Step 7
Bring the thread from the back onto the front side. Instead of winding completely around push the needle down to the back at the half way point. Now you are going to secure the centre point and at the same time bring the back threads into alignment with the top threads.
With the needle threaded, criss-cross across the centre point, pulling the back threads into place as you go. Continue until all are aligned. This is important. If you don't make sure that they are aligned before beginning weaving your button will be off-centre. Try and keep the centre neat but don't stress too much as it can be covered by beads or sequins.

Step 8
To start filling in the centre we are going to use a basic over / under weave. This is why you needed an odd number of spokes. I always start at the top near the scew eye. Continue over / under until you get back to the top. The odd number automatically makes sure that the next time around the moves are opposite.
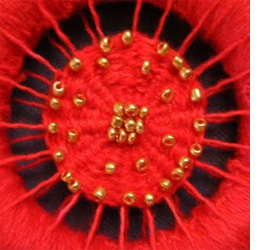
Step 9
Now it's time to personalise your decoration. There is no need to completely fill in the centre.
trishalandesigns.blogspot.com