
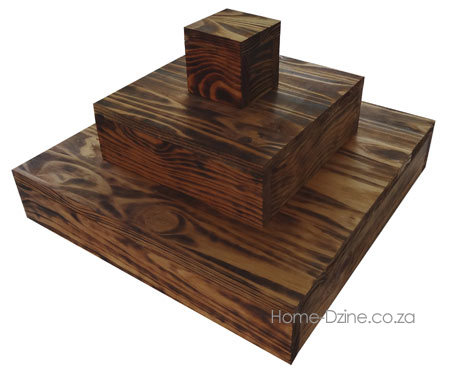
DIY Rustic Cupcake or Cake Display
I saw a rustic cupcake stand on etsy and realised how easy it would be to make one. A few scraps of PAR pine and you can make a 3-tier rustic cupcake or cake stand for a special occasion or a DIY wedding celebration.
09/2023
Visit the timber section at your local Builders Warehouse and select the best laminated pine shelving or PAR pine that you can find. It's best to use pieces without any knots are obvious join sections.
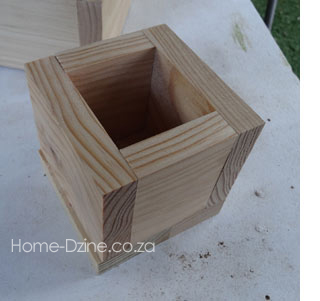
To make each tier of the cupcake stand you will need a top, front and back, and two side sections. The tops vary in size from 450 x 450mm for the bottom, 300 x 300mm for the middle and 100 x 100mm for the top. You can modify these sizes depending on the size you want, and whether or not you want to add more tiers.
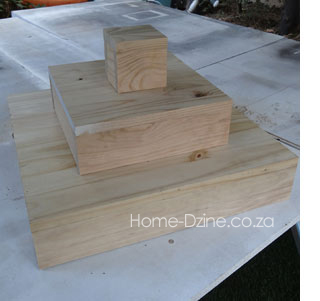
After gluing all the sections together and leaving overnight, you need to sand to remove any irregular edges with 120-grit sandpaper, and to smooth with 240-grit sandpaper.
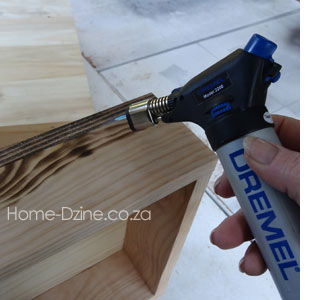
I used my Dremel VersaFlame to create the contrasting detail on the boxes. If you've never burnt wood before, practice on a piece of scrap wood before tackling the main project. The trick is to hold the VersaFlame away from the surface so that it just scorches the surface of the wood - and work from side to side in a gentle flow. If you stop you will scorch too much and it will look uneven.
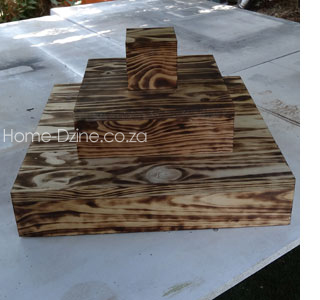
Here are the finished boxes once finished scorching. The wood burning process took me about 45 minutes to do.
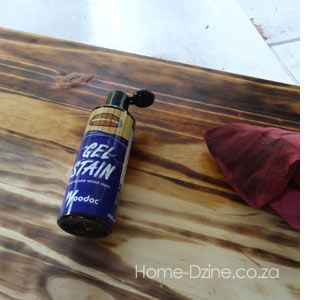
At this point, you can choose to leave the boxes as they are, or you can stain or varnish. I decided to add Traditional Teak gel stain. I like the finished result that it gives to the boxes and adds even more effect. If you wanted to add some colour to your rustic cupcake cake, you could use coloured wood stain or paint on a coat of acrylic paint.