
Make wooden moveable dinosaurs
Now that Christmas is over and you've had chance to discover just how expensive children's toys have become, here's a much cheaper alternative that kids will love to play with - and you can make them out of scraps of pine, supawood or plywood.
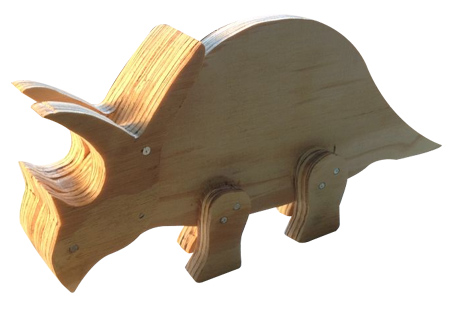
This is an instructables project that I discovered and it really is a nifty way to make wooden toys that young kids can play with. You can use craft paint to add detail, if required.
YOU WILL NEED:
12mm plywood (size will depend on how big you make your dinos)
Nails
Wood Glue
Optional for accessorizing:
Small Hinge if you want a tail to swing
Large Nail if you want the mouth to open and close (I actually used the scrap rod from a rivet)
TOOLS:
Scroll Saw or fine blade Coping Saw for low tech
Bench Belt Sander or sand paper for really low tech
Hammer
HERE'S HOW:
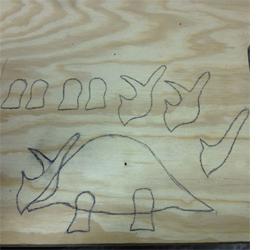
Start by roughly sketching what the dinosaur will look like, along with what could be done to make them more action filled - tail swinging fury and veggie chomping carnage.
Once you are happy with the design, transfer this onto the timber or board.
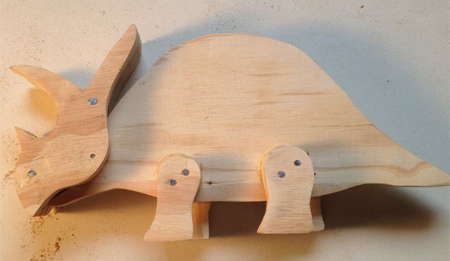
You will need four legs (two front and two back)...assuming your doing a quadruped.
The head for the triceratops was made of three pieces sandwiched together.. .the two outer pieces were identical with each having the nose horn, main horn and frill. The inner piece had only the nose horn and frill so this would give the look of three separate horns. The line going through the head to the bottom jaw is the part of the body that the head will attach to.
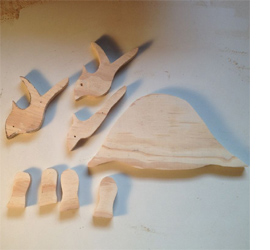
Cut out all the parts using a jigsaw. I tacked the front legs together and sanded them until they were uniform and then did this with the back legs and head pieces. Finally I did a light sand on the body to smooth it off.
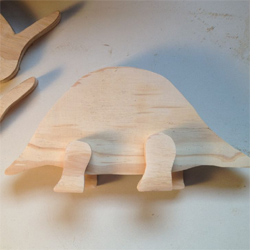
Decide on where you want your legs placed; put a dab of wood glue on them and then nail them down. After all four legs were attached, I checked the levelness of the dino standing and sanded down the bottoms of the feet until it sat right
Glue the inner head piece to the outers, making sure that the nose horn and frill on all three are lined up. Nail the three pieces together. A well placed nail will do great as eyes for your dino. I did a nail on each side of the head in roughly the same spots. You may need to do additional sanding of the head after putting it together to make sure that things are smooth and uniform.
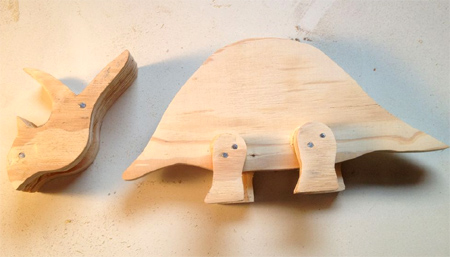
I attached the head to the body with a scrap rod from a rivet but a large nail would work perfectly also. Just drive it all the way through both sides of the head and body. The amount of room you have to work with the "cheeks" of the dino and the body will determine how far you can get the mouth to open.

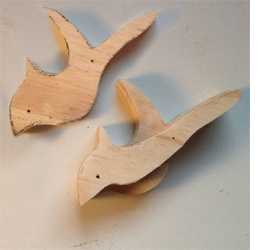
Here's a wooden stegosauras with hinged tail that swings in fury and battle. On this model the sides of the head move up and down.
