
Make a clay tealight candle holder
Das or Jovi clay is for me the easiest clay to work with. You don't need to bake this clay, simply leave in the sun for a few hours until it's dry and then you can paint it.
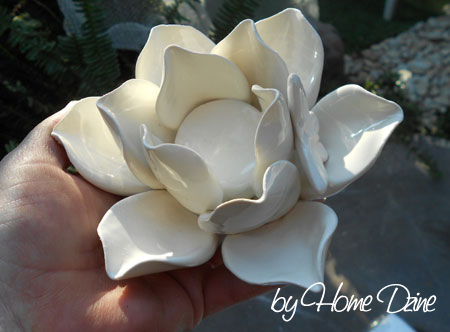
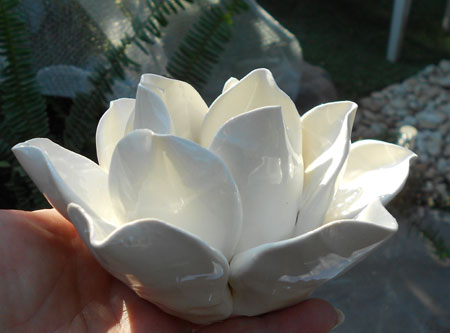
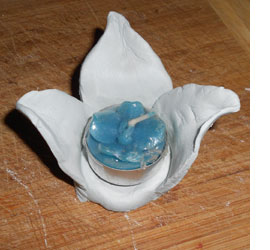
Today I'm going to show you how easy it is to make these gorgeous waterlily candle holders. I am making mine for tealight candles, but you can also make them for tapered candles - just make the base slightly thicker and add a suitably-sized hole for your candle.

YOU WILL NEED:
Das or Jovi air-drying clay
Rust-Oleum 2X gloss white
Board to work on
Tool with rounded end
Small container with water
It's better to use the white clay if you are going to paint your finished project in a light colour. The terracotta clay is perfect for a natural finish or where you want a darker colour.
HERE'S HOW:
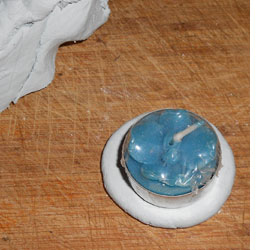
1. Using your fingers, break off a piece of clay to make the base. I use my hands to flatten and mould the clay into the shape I want. You could also use a small marble or perspex rolling pin - available from craft stores. If you want to make the candle holder for a tapered candle, make the base at least 2 centimetres thick and create a hole for the candle 1 centimetre deep.
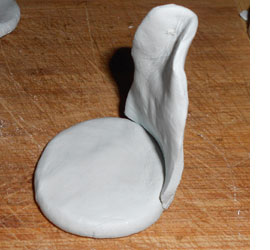
2. Break off equally sized pieces of clay for the inner row of petals. If you start off with them all the same size it's easier to end up with similar sized petals. Again use your hands and fingers to mould the petals to shape. I use the rounded tip of an artist's paintbrush to gently attach the bottom of each leaf to the centre base.
3. Continue adding the inner layer of petals in the same way, overlapping them slighting for a more realistic effect. The tip of each petal is folded in at the top and curved at the sides, but you will soon get the hang of this as you work with the clay. Make sure that each petal is firmly butted to the central base.
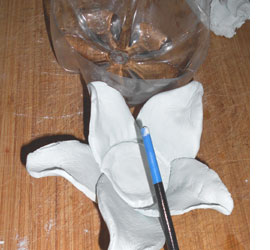
4. Using the rounded end of a paintbrush, I dip this into my water and gently work around all the joined sections to blend these together and smooth out. Don't use too much water, as the clay will go soggy and soft.
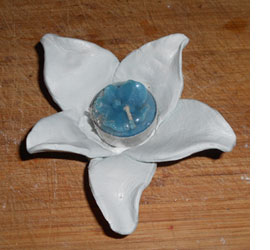
5. Make any final adjustments to your inner row of petals before adding the outer row of petals. Once done, place your candleholder outside in the sun to dry. You will see that as the clay dries it goes whiter and the base will take longer to dry because it's underneath.
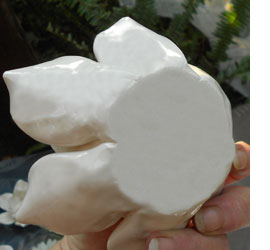
6. When completely dry, spray with Rust-Oleum 2X gloss white. Only apply a thin even coat in one go, and let this dry completely before spraying on another thin coat.