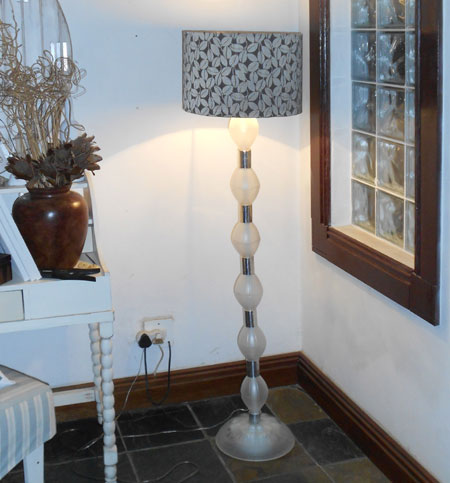
A floor lamp from plastic bottles!
Every time I hold a piece of plastic household waste in my hands, I first check the plastics code on the base and then try to think up ways to use it, or repurpose it into something else. There are so many ways to repurpose plastic 2-litre bottles and this floor lamp is just one example out of many projects that I have done and just one more way to reduce household waste.

HERE'S HOW:
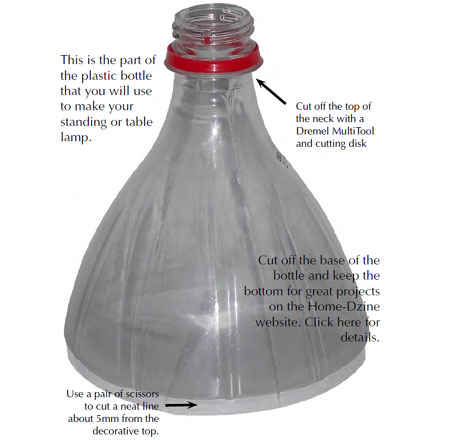
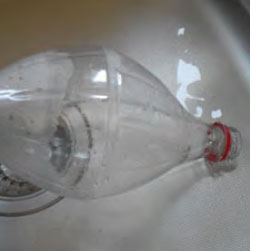
See the enlarged pic above that shows in detail the section of a plastic
bottle that you will need for this project.
GOOD TO KNOW
Don’t throw the bottom of the bottle away just yet, there are some great projects coming on the Home-Dzine website and in the Easy DIY
magazine.
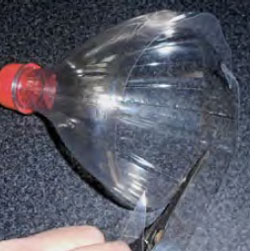
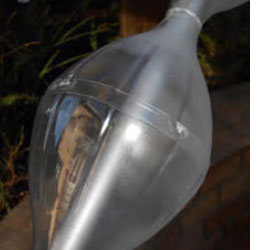
1. Remove the top section of the bottle with a sharp craft knife and then use a pair of scissors to trim at 5mm below the decorative pattern on the bottle. If your bottle doesn’t have a decorative pattern - you’re using the wrong brand of bottle!
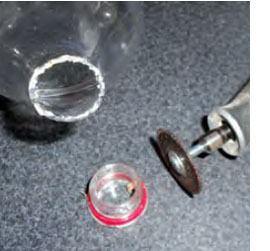
2. Use a Dremel Multitool and cutting disk to remove the top neck of the bottle. Be careful when doing this as you need to hold the bottle in your hand as you cut. You could also use a hacksaw to cut off the top of the bottle neck if you don't have a Dremel Multitool.
3. To make one section you need two top sections. I have found it easier to warm up the bottom of a section in hot - not boiling water to soften the plastic and make it easier to join two sections together. I’m not going to lie and say that fitting the two bottle sections together is easy, but it does get easier the more you do. The trick is getting one section to fit inside the other and the blerry thing keeps popping out. Persevere and you will come right.

4. When you have collected enough sections to make a standing or table lamp, slip them onto a piece of PVC pipe. You can use nail polish remover (acetone) to remove
the barcode. Take them outdoors to spray with frosted glass.
You don’t necessarily have to spray with frosted glass, you can also leave them clear. But I find the frosted glass hides any defects and it also matches the base I have found.
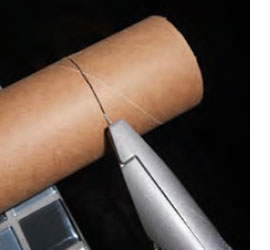
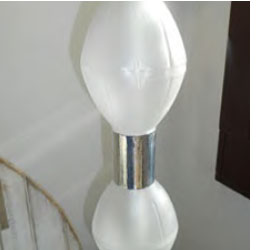
5. So that all the sections fit together nicely I used a cardboard tube cut to length and then wrapped this with aluminium self-adhesive tape. There’s no exact measurement for this, as it depends on how you cut off the tops, but try one size and then adjust as required until you get a nice fit. You can purchase aluminium tape at your local Builders Warehouse and there are plenty of projects on the Home-Dzine website that use aluminium tape. Once you peel off the backing it feels exactly like tin foil but with a self-adhesive backing.
6. To wire up the lamp you need to thread the electrical cord through the pipe. Strip the end of each wire no more than 5mm from the end and then twist the wires together so that there are no loose filaments.
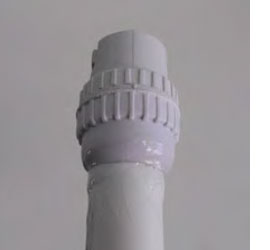
7. Thread the base of the lamp holder onto the top of the pipe and secure the wires to the lampholder connection. Pull on the wires to ensure they are secure and will not come loose and then screw the lampholder together.
8. Use 5-minute epoxy glue to attach the lampholder to the top of the pipe and leave this to dry for longer than 5 minutes! I don’t know why but sometimes it takes longer to dry than it should - perhaps temperature affects it. Just for security and peace of mind, I also wrapped a thin strip of white duct tape around the top as well.
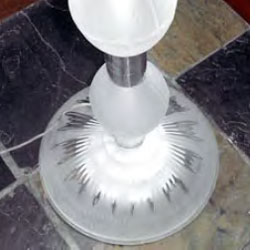
9. To make the lamp stand I bought a piece of 20mm PVC electrical pipe from Builders Warehouse and use a glass light cover that was a leftover from a ceiling fan that was broken and removed. To steady the base I cut circular rounds of 16mm PG Bison SupaWood that were glued together and drilled with a 20mm spade bit, so that the pipe would fit into this.
I love my new floor lamp with it’s silver and dark grey lampshade - also from Builders Warehouse.