Recycled plastic bottle petal lamp
I have seen so many gorgeous petal lamps and definitely wanted one for my TV room. Considering that you can pay anywhere from R800 upwards, once again I decided to make my own (!) and look at how to use plastic bottles to make it. I have done so many projects using recycled plastic bottles that I immediately thought about how to use the bottom part of the bottle for the petals.
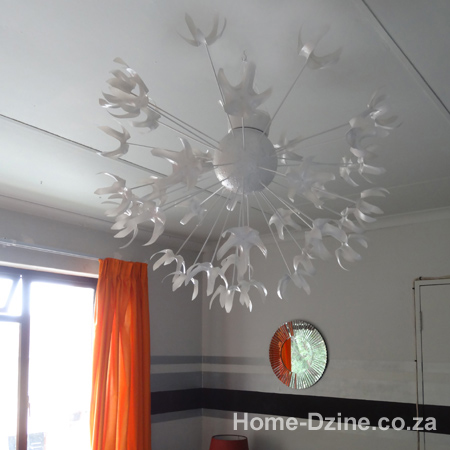
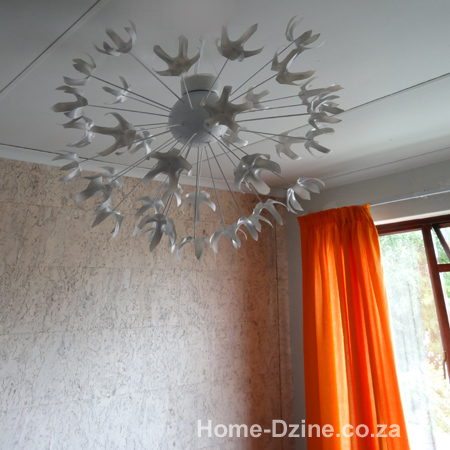
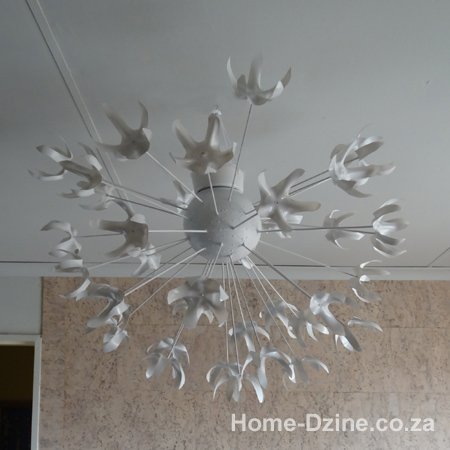
I haven't properly wired up the petal lamp yet, but have hung it from a screw mounted into the ceiling beams. To finish off all I have to do is pull the existing wiring through from the original ceiling light and mount this onto the light fittings.
Must be honest, the photos don't do justice to how the light looks in real life. I mention below that , if time allowed, I would add more petal stems and I do plan to make a similar light with more petal stems for my bedroom.
You will see in the instructions below that the globe lamp is a plastic one purchased at Builders Warehouse for about R50. When you consider what goes into making this lamp, factoring in the pine skewers and Rust-Oleum 2X spray paint, the total cost is around R160 - not bad when you think how much you pay to buy one of these.
YOU WILL NEED:
Plastic cold drink bottles - the more the better!
Craft knife
Scissors
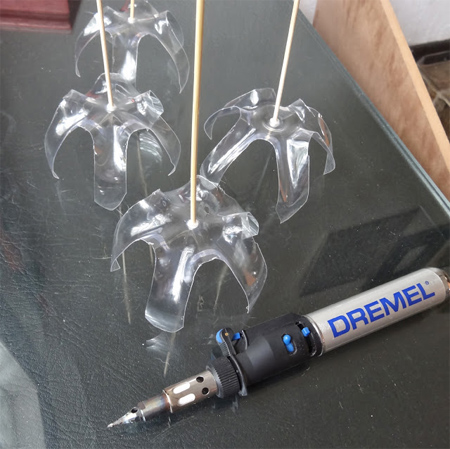
Pine skewers
Dremel VersaTip soldering iron (this one because you can control the heat)
Bostik Blits Stik superglue
Tape measure, dressmaking type
China marker
Rust-Oleum 2X satin blossom white
Nylon line and a hook for hanging
NOTE: I am making this petal lamp for a Rust-Oleum conference, so it was a bit of a rush job. If I had more time I would have added more plastic petals to fill up the globe.
HERE'S HOW:
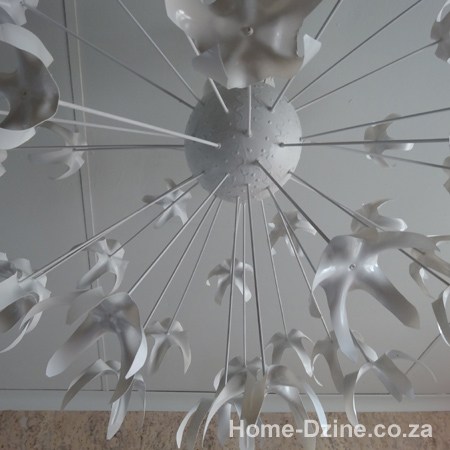
1. Remove the bottoms from your plastic bottles - at about 1cm up from the line that goes around the base. I have noticed that the majority of bottles have this line around the base. I cut my bases off with a craft knife and then neaten up with scissors.
2. Using the ridges in the base as a guide, cut out sections to create a petal pattern. You might fail on the first attempt but will soon realise that the shape of the base guides the cuts you make.
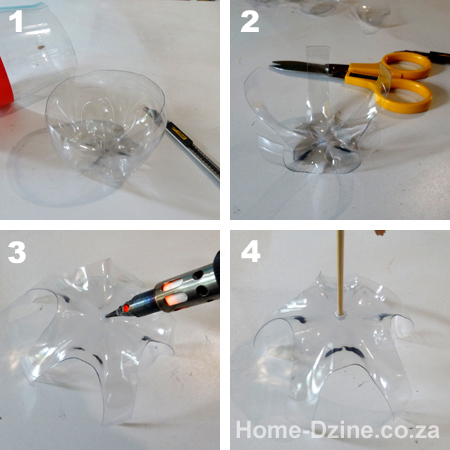
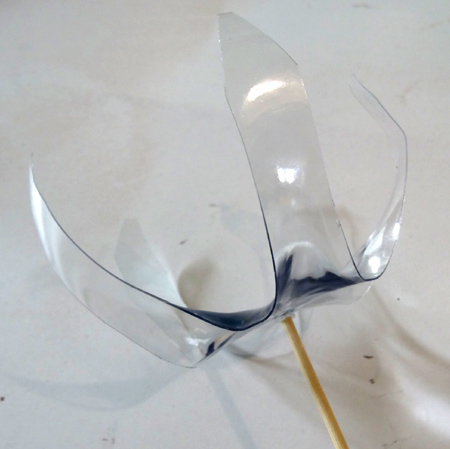
3. Using a soldering iron - and working quickly - make a hole in the centre of each base and immediately stick in the blunt end of a skewer.
4. You have to work before the plastic has time to set again, so have somewhere safe that you can drop the soldering iron as you work.
5. Here is the plastic light globe that I purchased at Builders Warehouse. I knew it would come in useful eventually!
6. Draw lines from the top to bottom around the lamp to divide it into sections. I have 8 sections on the lamp globe but would recommend that you divide into 16 sections. Use a dressmaking tape measure to mark every 2cm down from the top on each line.
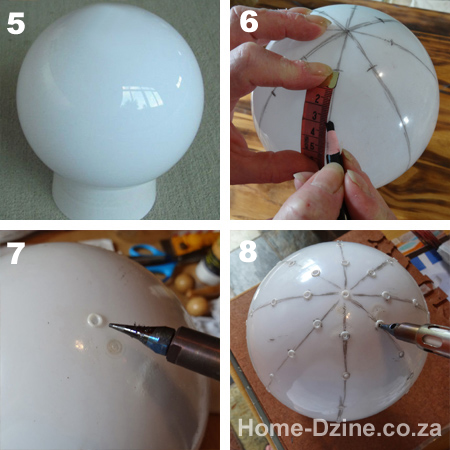
7. Using the same method as you did for the flowers, melt a hole at all the marked lines. Have the soldering iron set to the lowest setting and do not apply too much pressure as you melt a hole in the globe. If the iron is too hot and you press too hard your holes will melt larger than they should be. A good idea might be to buy 2 globes and use one for practice, which is what I did.
8. Continue to add holes at all the marked points. As you work you can test fit a skewer to make sure the holes are just large enough for the pointed end of the skewer to be pushed in.
9. Now you are ready to insert the skewers into the melted holes. Start at the top of the ball and work your way down.

10. Continue adding petal skewers at all points around the ball. If you find that the hole is too big, wrap a strip of masking tape around the tip of the skewer and push in place.
NOTE: I forgot to take of picture of the actual spraying process, but the entire ball, skewers, petals and base were sprayed with Rust-Oleum 2X satin blossom white.
11. To hang from the ceiling use the soldering iron to melt 4 holes at equal distances around the base.
12. Insert a length of nylon line and tie a double knot on the inside so that you have four lengths to knot at the end and suspend from a hook screwed into a ceiling beam.