How to paint a headboard
Easy DIY magazine recently commissioned me to design a couple of quick and easy headboard projects for future issues. I put my thinking cap on for this, and one idea that immediately came to mind was to paint a headboard.
YOU WILL NEED:
Rust-Oleum metallic leafing pen
Tape measure and pencil
Long ruler or straightedge
Eraser
GOOD TO KNOW
If you are painting the wall in a new colour, do this before you paint on the headboard design.
HERE'S HOW:
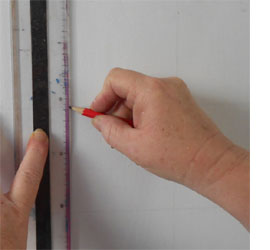
Start off by marking off the wall with a tape measure and pencil. My blocks are 10 centimetres square and we have covered the entire section of wall where the painted design will be added.
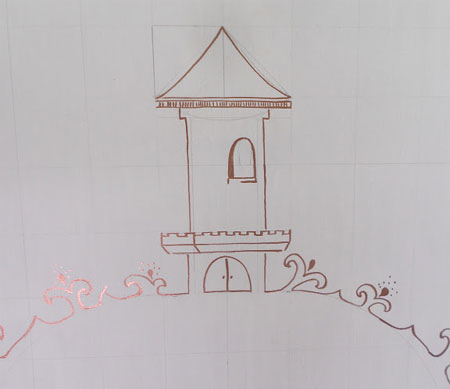
Once you have drawn all the blocks it’s time to start sketching out the design you want for the headboard. This fairytale castle is a simple design that is easy to do, even if your drawing skills are not that great.
GOOD TO KNOW
Have an eraser handy to remove any mistakes as you sketch the design.
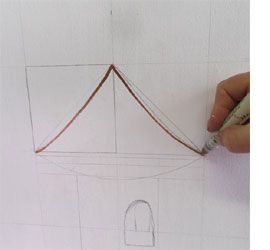
Use the Rust-Oleum metallic leafing pen to go over your drawn lines. Start from the top and work down and then to one side, so that the paint has time to dry. It only takes about ten minutes and then you can move to the opposite side.
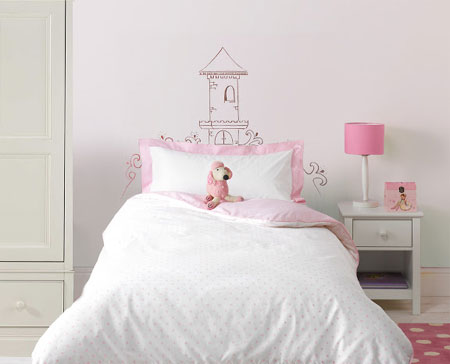
And there you have it… a delightful headboard that can be designed to match any bedroom décor or theme.