
Make a car organiser for the holidays
If you're driving down to the coast for holidays, or up north to visit relatives, this car organiser will ensure a smooth, 'whine-free' trip. The kids can pack all their toys away in the car organiser and they're easy to find without bothering mom or dad.

themayfly.com
I love mine! Or make one for your husband's car to hold those Manly-Man Necessities like his tape measure and small tool kit. Hey, wait - I have both of those in my car too...
YOU WILL NEED:
Medium-weight cotton fabric (something washable)
Matching thread
Sewing machine
Piece of elastic about 50cm long
Keep in mind, to make them like I did, your headrests need to be removable. If yours aren't, you'll have to get creative with the tops. I used a grey twill so it would blend in with the car upholstery, but you could always use something bright to jazz up the back seat or use contrasting fabric or patchwork for the pockets.
HERE'S HOW:
Step 1
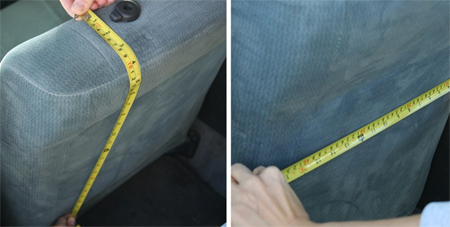
Remove the headrest and measure the back of the seat. Be sure to include the amount of fabric for the top edge, the part that gets sandwiched under the headrest.
Step 2
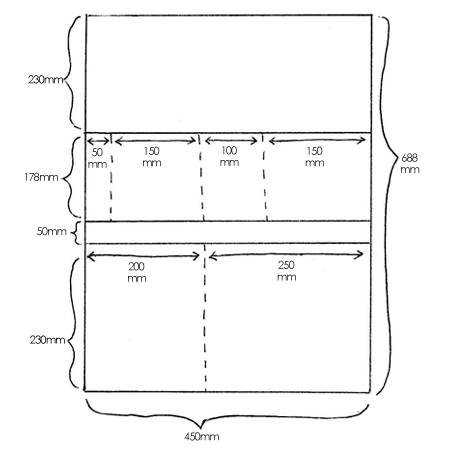
Draw out your organizer on a piece of paper and plan your pockets. This drawing shows my finished measurements. Play with these to fit the items you typically carry around in the car. Since these are for my kids, I was sure to include large pocket on the bottom row to accommodate a standard colouring book and skinnier pockets on the top for coloured pencils.
Step 3
Cut out your pieces. Add 24mm to the height and width of each piece to allow for hemming.
Step 4
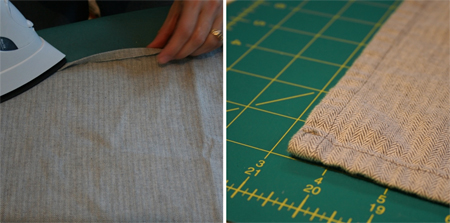
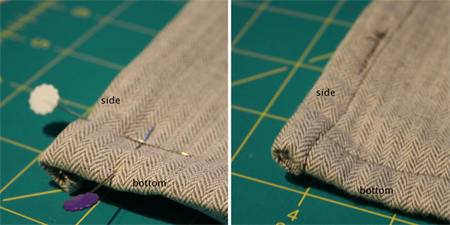
Work with your base fabric first. Turn all edges under and press, turn again, press and hem all the way around. Top stitch along bottom of pocket and along the sides. Top stitch down the middle of the pocket at predetermined intervals to form the smaller pockets. Top stitch down the middle of the pocket to form smaller pockets.
Step 5
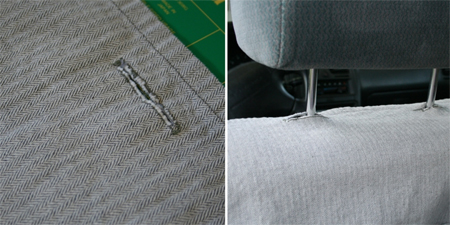
Hang your organizer in place and by feeling through the fabric, pin or draw where your large button holes will go. The head rest will slip through these button holes. Sew your button holes.
Step 6
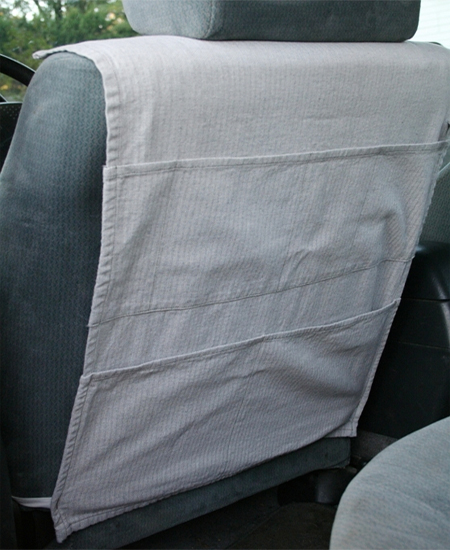
Hang your organizer in place and attach the head rest. Pull it down tight, wrap the elastic around the base of the seat and pin in place. Remove the headrest, slip the organiser back off the seat, sew and trim the elastic.
Woo hoo - You're done! Hang, de-clutter, and hit the road, baby.