
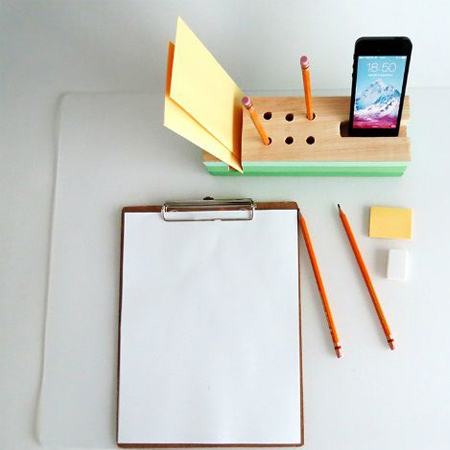
Make a handy desk organiser
Keep your desk tidy with this mini desk organiser made using pine blocks.
YOU WILL NEED:
3 of 20 x 67 x 250mm pine
- cut two sections into two parts: 200mm long and 30mm long
120-grit sandpaper
Drill / Driver plus 10mm wood bit
Hammer and wood chisel
Wood glue
Acrylic craft paint and supplies for painting
Acrylic sealer (Mod Podge) to finish
Tape measure and pencil
Quick clamps
Buy the pine you need for this project at your local Builders store.
HERE'S HOW:
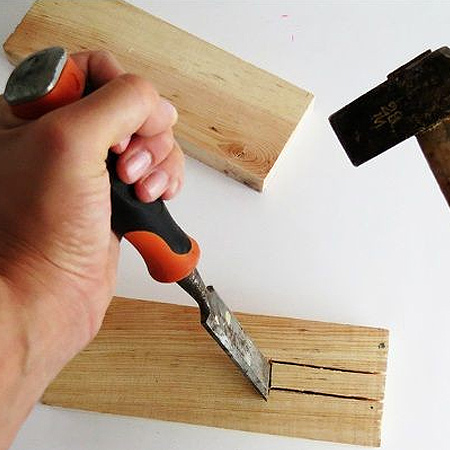
1. On one 200mm section of pine draw a rectangle approximately 20 x 100mm in size. Use a hammer and sharp wood chisel to cut out this section. Note: If you have a jigsaw you can use this to remove the rectangular shape. Sand smooth once cut out.
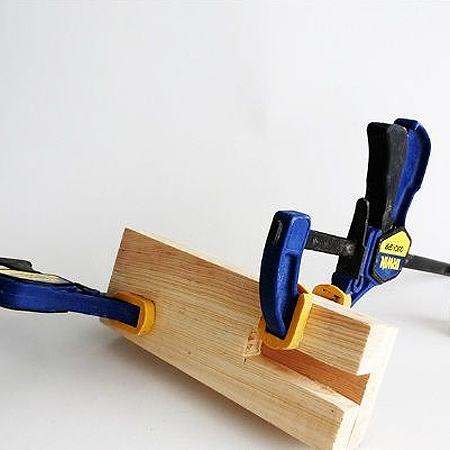
2. Use wood glue to secure the cut 200mm section to the second 200mm section and clamp together - leaving overnight. At the same time also glue together the two 30mm sections.

3. Measure and mark the locations to be drilled for the pen / pencil holder section. We allowed for 6 holes that are 20mm in from the edges.
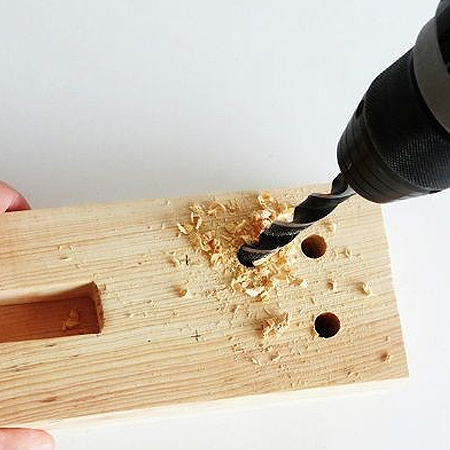
4. Use a drill / driver and 10mm wood bit to drill holes through both sections. Sand smooth.
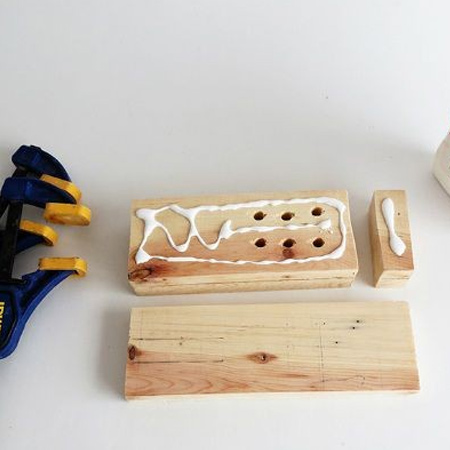
5. Place the glued sections onto the bottom section, apply wood glue, clamp and leave overnight.
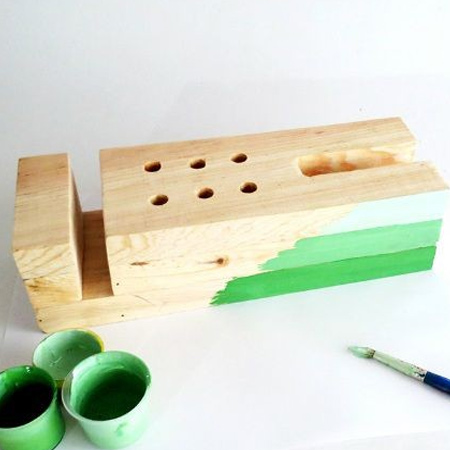
6. To finish off your new desk organiser, sand smooth with 120-grit sandpaper before painting in your choice of colour and applying 2 coats of sealer.
todomanualidades.net