
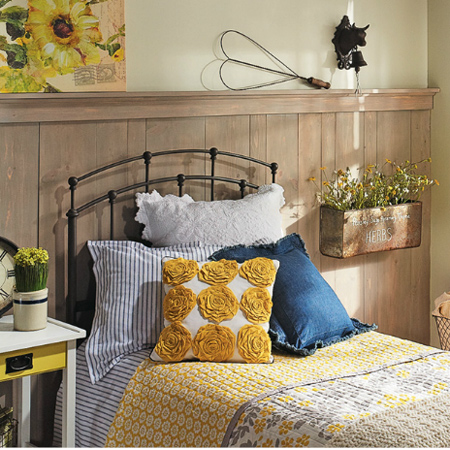
Add Rustic Charm to a Quest Bedroom
Here's an easy way to add rustic charm to a bedroom by adding pine moulding and trim to create a feature wall behind the bed. You can paint or stain the pine to match the existing decor and add a few accessories to dress up a cosy guest bedroom.
YOU WILL NEED:
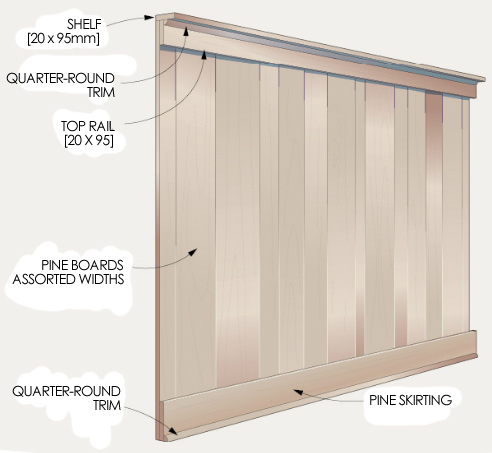
PAR pine according to diagram below
No More Nails ultra interior adhesive
Plascon Polvin in your choice of colour
Paintbrush
Lint-free cloths
180-grit sandpaper or sanding sponge
Hammer and panel pins
Tape measure and pencil
Optional: Antique wax or clear polyurethane varnish
HERE'S HOW:
1. With all the pine cut to length it's easy to prepare the parts before mounting onto the wall. Apply a light coat of acrylic paint to the top of the boards. Don't cover the entire board if you are looking for the rustic effect shown here.
2. Use a lint-free cloth to rub the paint over the board to cover the entire surface. By painting and rubbing you can easily create a washed effect without having to apply any additional techniques.
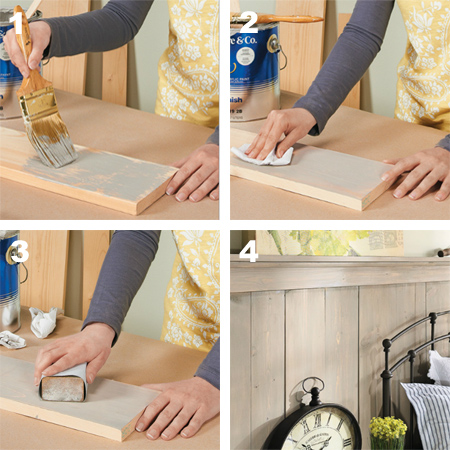
3. Once the paint is dry, wrap a block of wood with 180-grit sandpaper - or use a fine sanding sponge - to smooth the painted finish and allow the wood grain to show through.
4. Mount the back boards onto the wall using Pattex No More Nails adhesive. Using a caulking gun, apply a thin bead of adhesive around the back of the board, about 2cm in from the edge. The instant tack means the boards stay where you put them until the adhesive sets. Continue adding sections as shown in the diagram above. Leave everything overnight and in the morning use a hammer to pop in a few panel pins at the back edge of the shelf.
Finishing
For added protection, apply antique wax or clear polyurethane varnish in suede or gloss.