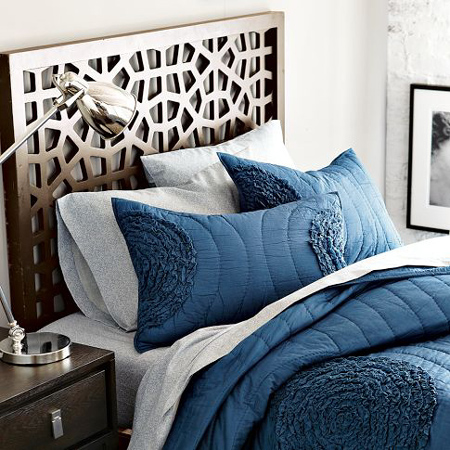
Make a contemporary headboard
Making your own contemporary headboard with fret-work design is not that difficult if you are prepared to spend some time cutting, and just to make it easier for you, I have included the design for the headboard.
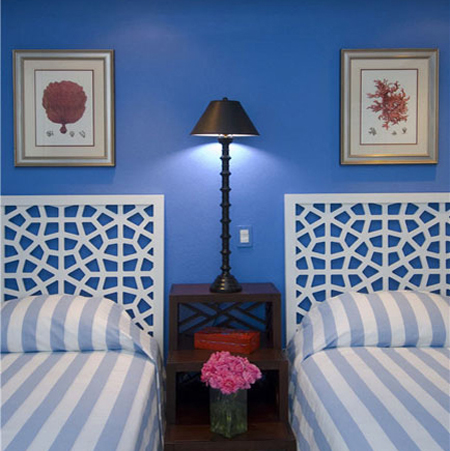
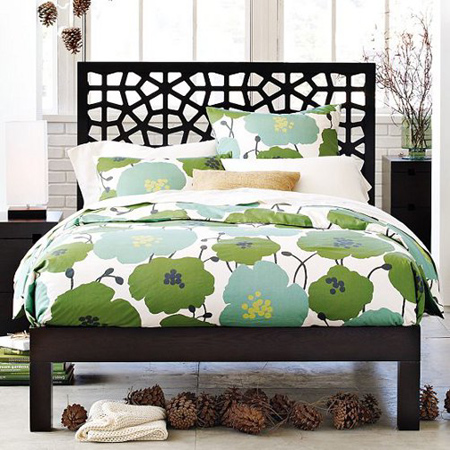
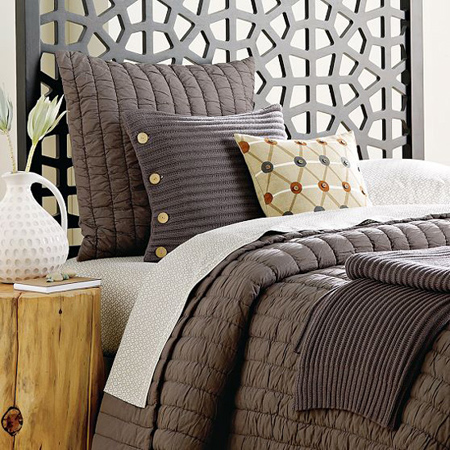
This headboard is my favourite design, but have only recently made myself an upholstered headboard, I'm not yet ready to replace. So, if any readers want to make this contemporary headboard, grab your materials and tools and let's get started...
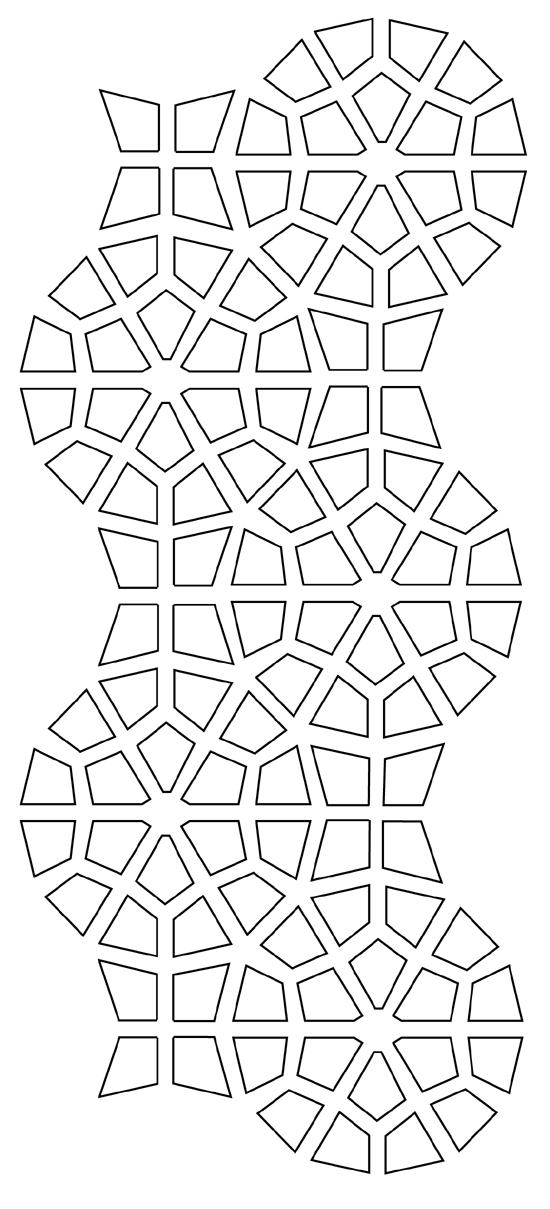
CLICK ON IMAGE FOR ENLARGED VERSION
YOU WILL NEED:
44 x 44mm PAR pine for the frame
16mm SupaWood for the design panel
50mm long wire nails
2 keyhole brackets (if mounting onto wall)
Wood filler
120- and 240-grit sandpaper
Rust-Oleum 2X in gloss kona brown or satin espresso
TOOLS:
Jigsaw and clean-cut blade
2 workbenches
Clamps
CONTINUES BELOW
HERE'S HOW:
Have the design panel cut to the width of your bed and the height required. If you prefer, deduct the 44mm on either side for the PAR pine so that the headboard is exactly the same width as the bed. I think it's better to cut the panel to the width of the bed and have the PAR pine extend slightly wider than the bed to allow for bedding.
You can either have the panel cut so that it mounts onto the wall behind the bed, or purchase extra pine to make legs that would be attached to the bottom of the frame. It's entirely up to you. If you are mounting directly onto the wall, use keyhole brackets at the back of each side. Click here for instructions on attaching keyhole brackets.
Design Panel
Using the design pattern supplied above, enlarge and transfer onto the design panel. Cut this out with your jigsaw by laying the panel over two workbenches so there is nothing underneath where you are cutting. Be sure to clamp the panel to each workbench to secure. After cutting out, sand all cut edges nice and smooth for painting. It's easier to paint in sections, so spray the design panel first.
Frame
Cut the 44 x 44mm PAR pine to fit around the frame. You can have mitred corners if you have a mitre saw or mitre box, or you can use a pockethole jig, dowel joints, biscuit joints or corner braces to join the pieces together to create a snug frame.
To ensure the design panel is secure within the frame, hammer in a few 50mm long wire nails through the sides, top and bottom of the frame. Hammer the nail heads so they are completely flush with the surface of the wood. You can fill in any imperfections with wood filler and then sand smooth before spray painting.