
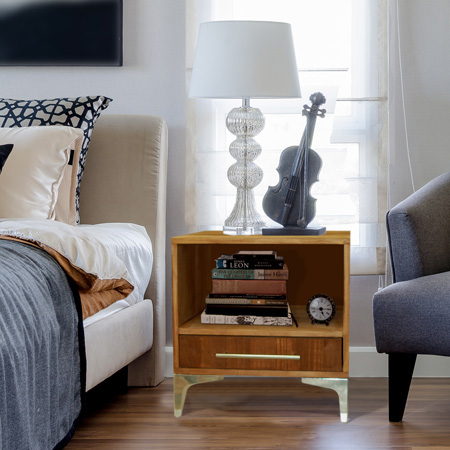
DIY Bedside Cabinet
Make this beautiful bedside cabinet with laminated pine shelving from your local Builders. It will only take you a day to complete.
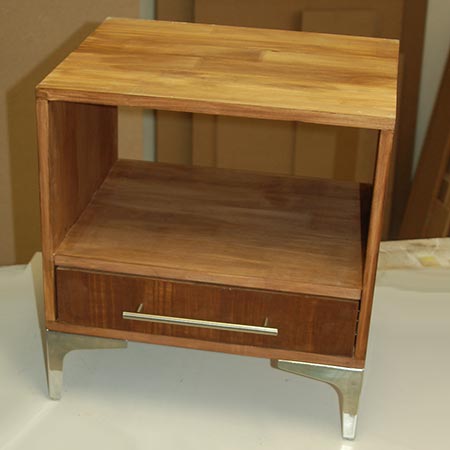
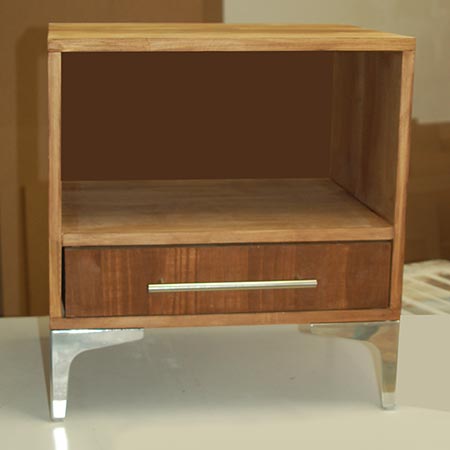
What makes this an easy project is using a Biscuit Joiner to assemble the sections for the cabinet - and no visible screws!
The cabinet is made using laminated pine shelving that you can buy at Builders Warehouse and doesn't cost a fortune. After making the pine bedside cabinet you have a variety of finishing options. For ours, we applied Woodoc Gel Stain in Traditional Teak and then a coat of Woodoc Antique Wax.
YOU WILL NEED:
Note: Our laminated pine was 19mm thick. Any difference in thickness and you will need to adjust the measurements.
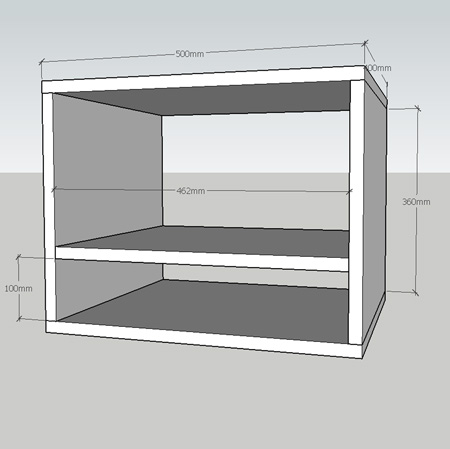
1 of 450 x 1800mm (19mm thick) laminated pine shelf cut to:
- 2 of 500 x 400mm - top/bottom
- 2 of 362 x 400mm - sides
- 1 of 462 x 400mm - shelf
- 1 of 96 x 436mm - drawer front
2 of 90 x 369mm 12mm SupaWood - drawer sides
1 of 90 x 436mm 12mm SupaWood - drawer back
1 of 369 x 412mm 12mm SupaWood - drawer base
Ponal wood glue
3.5 x 30mm screws [10]
400mm ball bearing drawer runner plus 16mm screws [6]
2mm spacers
Knob or handle and screw
TOOLS:
Drill / Driver plus bits
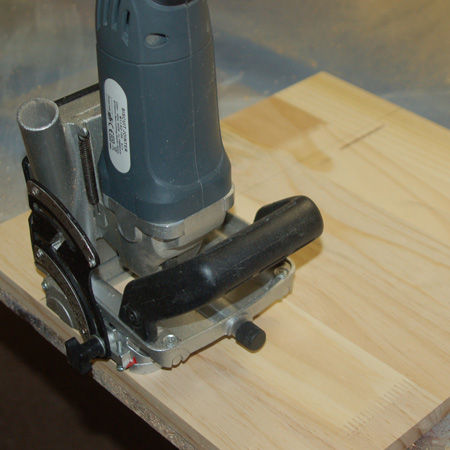
Biscuit joiner plus #10 biscuits
Bar or quick clamps [2] - make your own bar clamps
Orbital sander plus 120- and 240-grit sanding pads
Tape measure and pencil
Find everything you need for this project at Builders Warehouse.
HERE'S HOW:
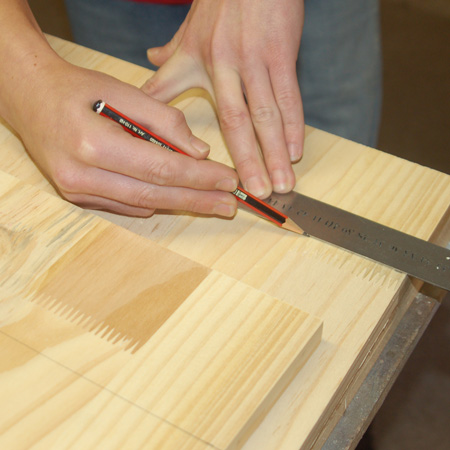
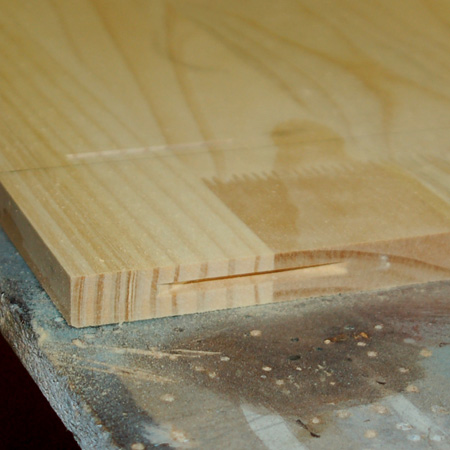
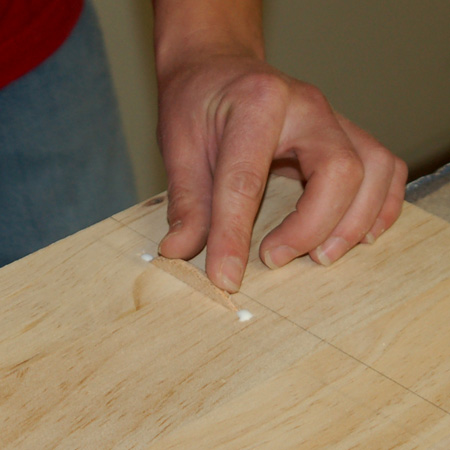
1. To assemble the cabinet section, a biscuit joiner is used to cut two slots in the sides, top and bottom and shelf (edges). You also need to mark and cut slots in the sides where the shelf will be mounted (see above and below).
BELOW: Slots cut at the top / bottom of the sides.
2. Start the assembly by attaching the shelf to the sides. Fill the slots with a bead of wood glue.
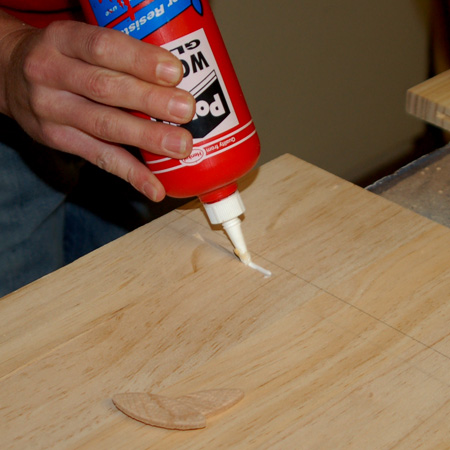
3. Push a biscuit into the glued slots.
BELOW: Secure the shelf to one side and then flip to attach the other side.
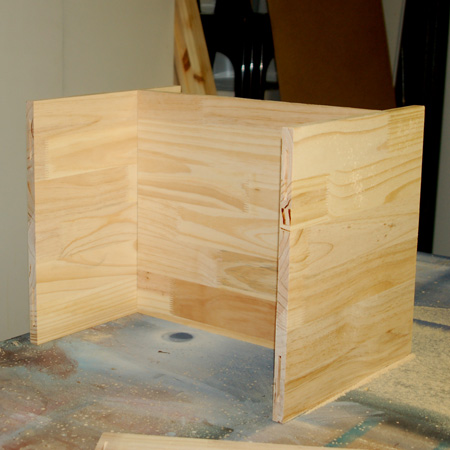
4. The sides, top and bottom and attached in the same way.

BELOW: Attach the top and then flip to attach the bottom.
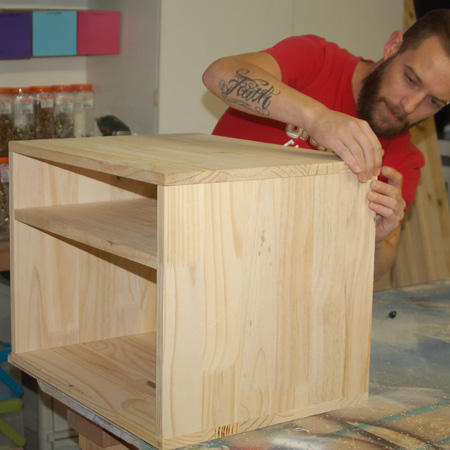
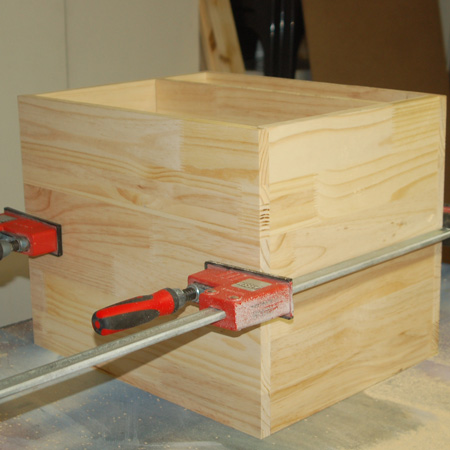
GOOD TO KNOW: To ensure everything is glued together properly, clamp and leave overnight. If you don't have long bar or quick clamps, wrap with tape.
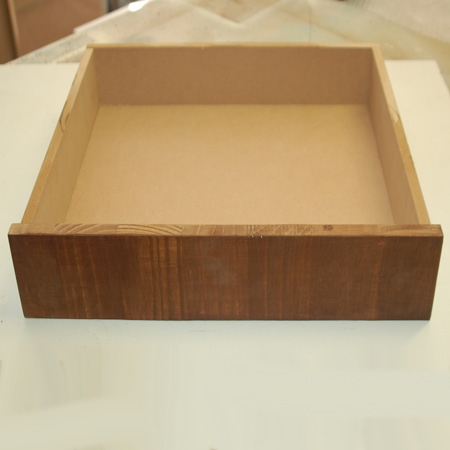
5. Assemble the drawer using wood glue and 30mm screws. The sides and back are screwed around the base. The drawer front is glued in place and left overnight - drawer face down.
GOOD TO KNOW: We used 12mm SupaWood offcuts to make the drawer, but you can substitute this and adjust the measurements accordingly.
6. Attach the drawer runners to the side of the cabinet. Allow for the thickness of the drawer front between the edge and the drawer runner. For example: If the pine is 19mm thick, mount the drawer runner 19mm back from the edge - if the pine is 22mm thick, mount the drawer runner 22mm back from the edge.
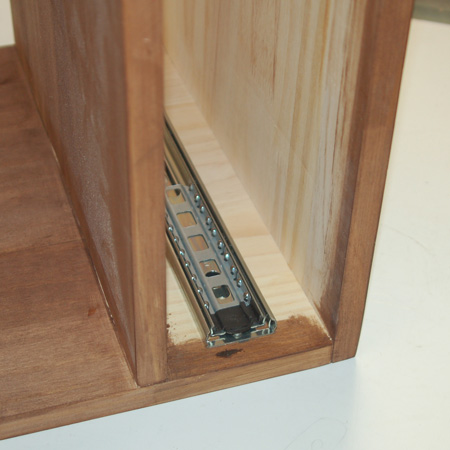
7. Use 2mm spacers to ensure clearance underneath the drawer.
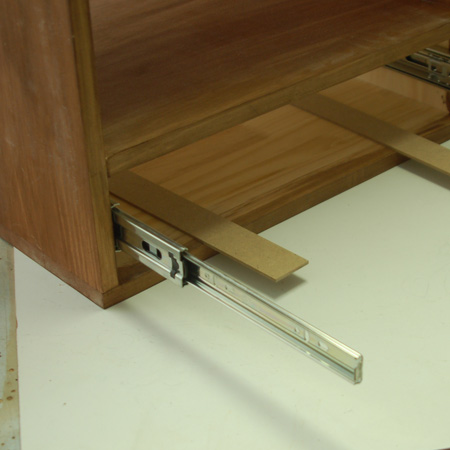
8. Place the drawer, pull out the runners and then attach to the sides of the drawer. Click here for more information on installing ball bearing drawer runners or invest in a Kreg Drawer Slide Jig..

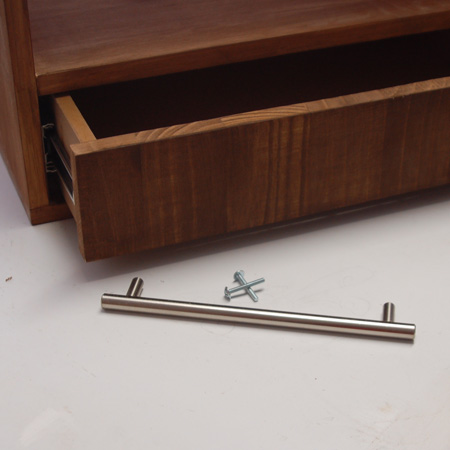
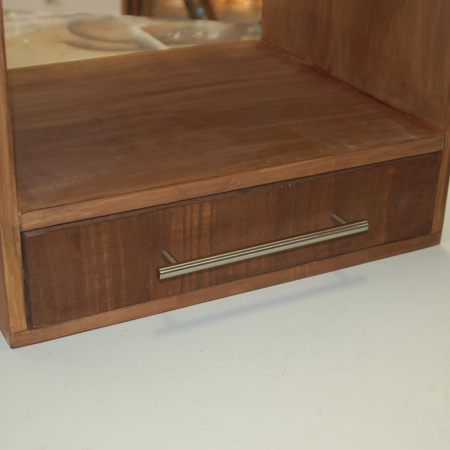
9. Attach the handle or knob to the drawer front.
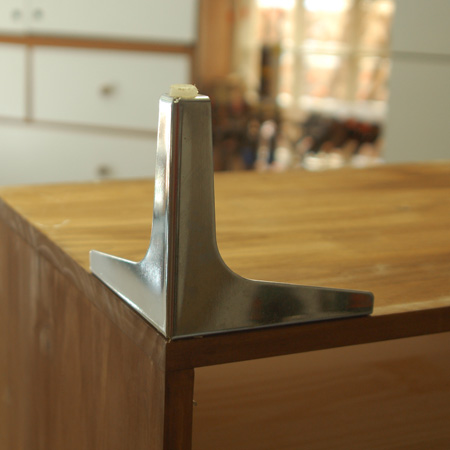
10. Attach the legs to the bottom of the cabinet with 16mm screws.
Finishing
After making the pine bedside cabinet you have a variety of finishing options. For ours, we applied Woodoc Gel Stain in Traditional Teak and then a coat of Woodoc Antique Wax. You can stain and apply a Woodoc 5, 10 or 20 clear interior sealer, or apply a pre-tinted interior sealer. Find the full range of Woodoc products at Builders or your local hardware store.
