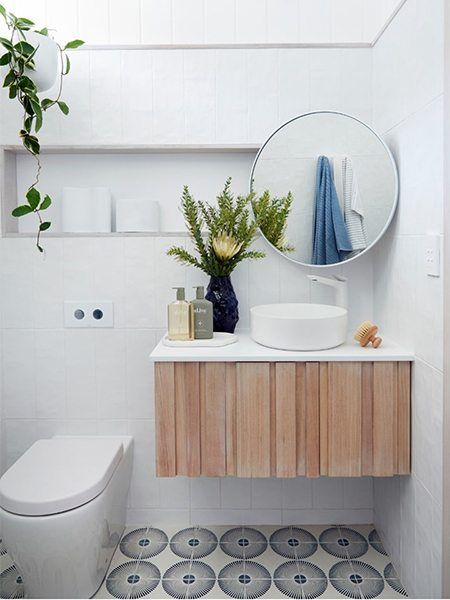
This Bathroom Vanity is Easy to Make Using Scrap Wood
Made using board and scrap wood, this bathroom vanity adds a rustic touch to a bathroom, plus it has hidden storage.
29/10/2023
Better Homes & Gardens Australia
Better Homes & Gardens Australia
YOU WILL NEED:
Plywood, SupaWood or chipboard sheet 16 x 2400 x 1200mm
[4] 45mm cut screws
Waterproof glue
[6] Concealed, cup or Euro hinges - full overlay plus 16mm screws
[3] Door catches plus 16mm screws
Scraps of hardwood or pine - see bottom of this page for diagram
Stain blocker for wood
Clear varnish, matt
TOOLS:
Drill plus assorted bits
Countersink bit
35mm Forstner bit
Sander plus 120-grit sandpaper
Saw for cutting board to size if doing it yourself
Clamps
Painting gear
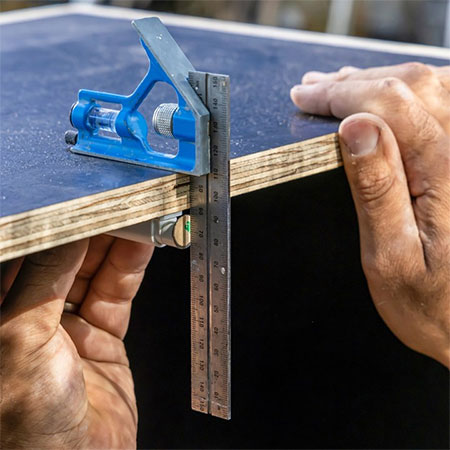
Tape measure and pencil
Safety gear
HERE'S HOW:
Preparation
Have all the pieces cut to size at Builders and sand all the rough edges. Some of the images shown below will reveal that the original for this project was assembled using recycled laminated plywood. If you are going to be using any material with a laminated finish, sand this with 120-grit sandpaper so that the surface will accept the glue alternatively, use Contact Adhesive when attaching the scrap wood to the outside of the cabinet.
GOOD TO KNOW
Countersink all screws so that the head does not stick proud of the surface.
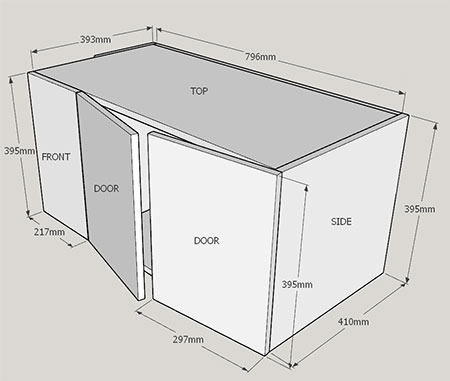
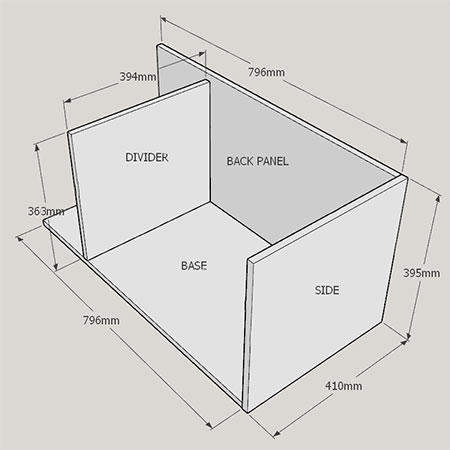
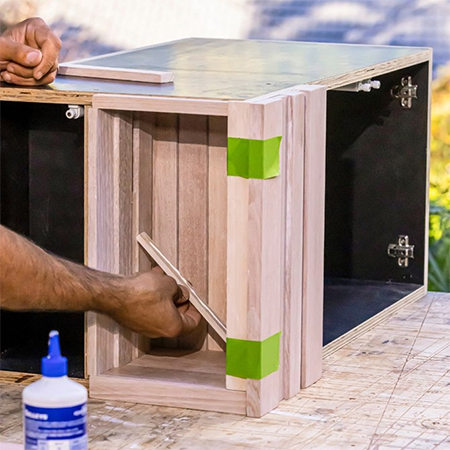
Step 1 - Assemble the framework
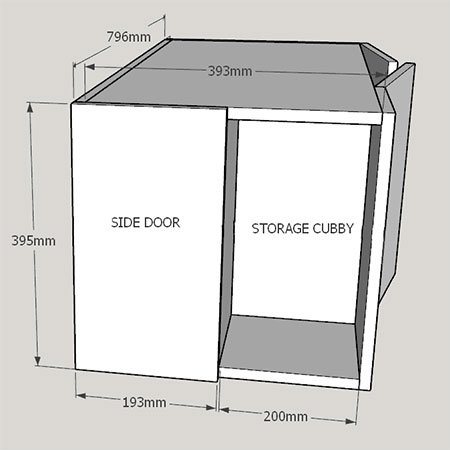
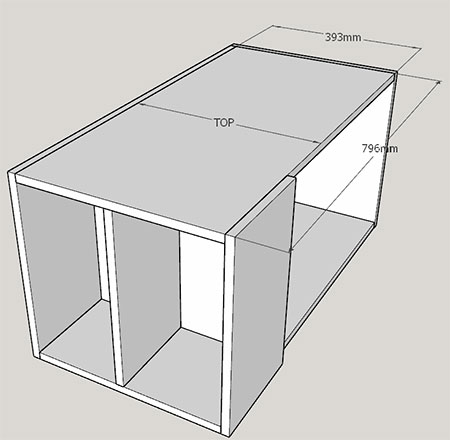
Start the process by attaching the back panel to the base using wood glue and 45mm cut screws and then position the divider 201mm in from the side edge and secure to the back panel with wood glue and 45mm cut screws. To complete this step, attach the side panel to the base and back panel using wood glue and screws, as indicated in the diagram below.
Step 2 - Assemble the storage cubbies on the end of the cabinet
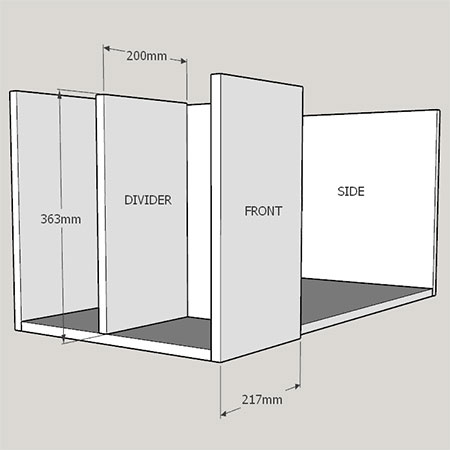
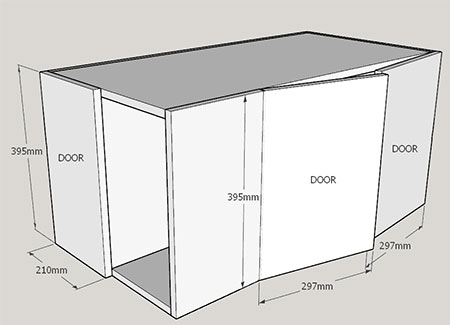
Position the centre divider at 200mm from the back panel and secure with wood glue and 45mm screws before adding the front panel in the same way.
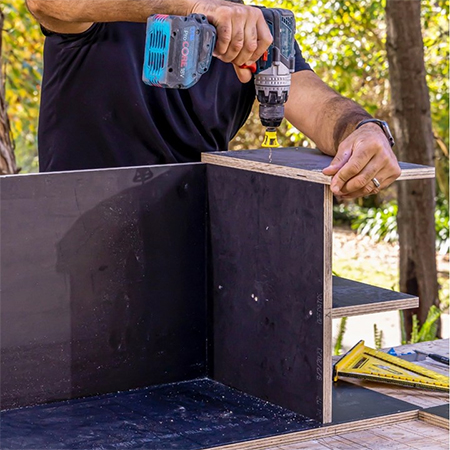
Step 3 - Fit the top
Insert the top so that it is flush all around and then secure to the back panel, right side and dividers. Again, make sure that all drilled holes are countersunk.
Step 4 - Install the doors
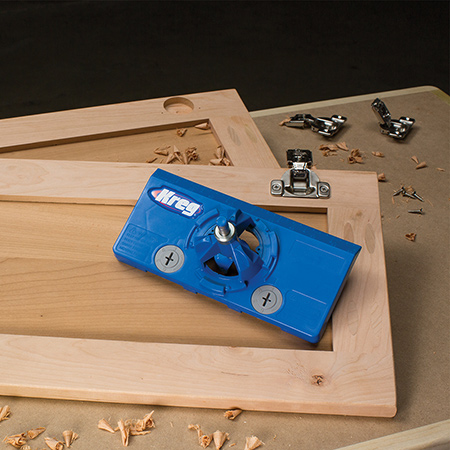
To drill holes for mounting the door hinges, use these instructions for marking. You will need a drill, Forstner bit [what is a Forstner bit] and clamps. Mark position, predrill holes. Repeat for all door panels.
Kreg tools are available at hardware stores countrywide as well as online suppliers. For more information visit www.kregsa.co.za.
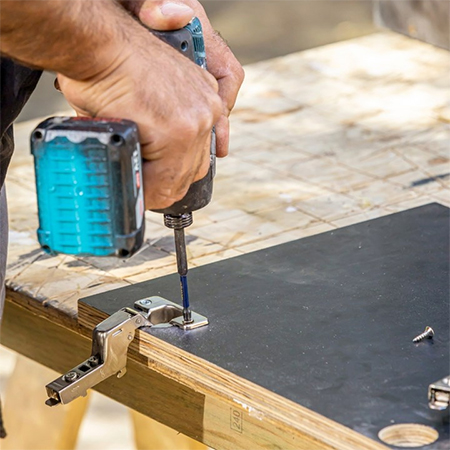
Install the doors using the hinges by holding each door to line up with the frame. Mark the position of screw holes for mounting the door to the hinges and predrill before mounting the doors. Any adjustments can be made by adjusting the screws on the hinges themselves to align the doors.
Step 5 - Fit door hardware
Push-catches were used to fit these doors but there are all different types of hardware to hold doors in place. For all types, you want to ensure accurate placement and accurate measuring is required. Fit the catches using 16mm screws.
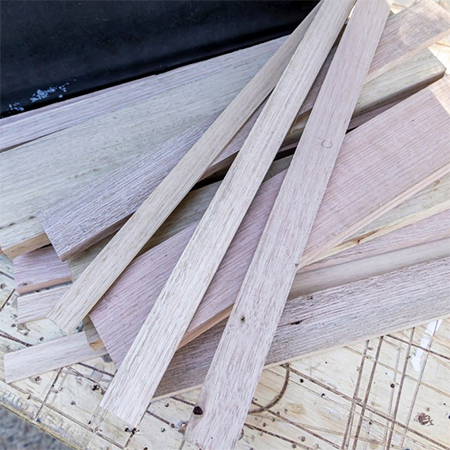
Step 6 - Prepare and fit scrap pieces
Cut the scrap wood to the lengths and widths per the cutting list at the bottom of this page. Sand rough edges with 120-grit sandpaper and then apply stain blocker as a whitewash to the sides and front faces of each piece. Allow about 20 seconds before wiping off the excess stain blocker and leave to dry. Repeat this for all the pieces.
GOOD TO KNOW
Apply stain blocker to screw heads to make them less visible.
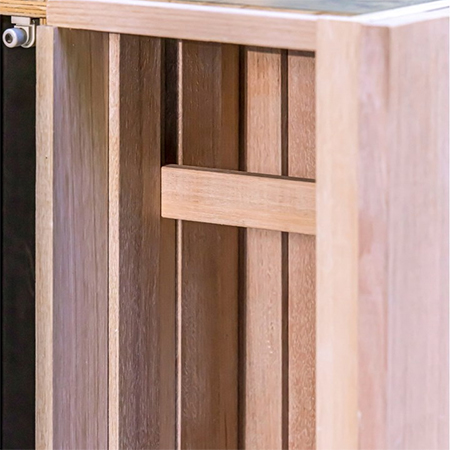
Working in one section at a time, apply wood glue liberally to the back of each piece of scrap wood and press firmly to secure.
GOOD TO KNOW
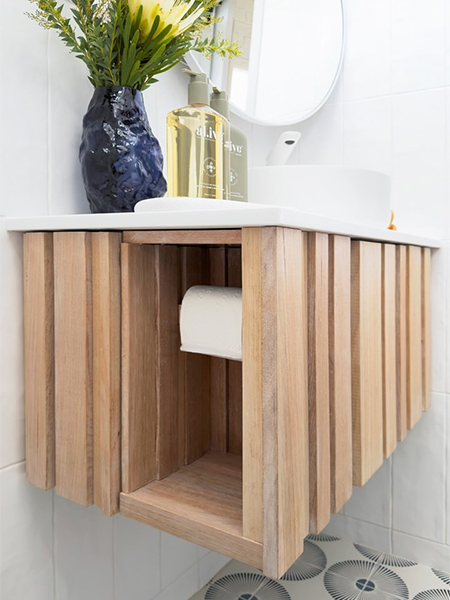
Where the toilet roll holder will be fitted install cladding to the base first and then the back panel and then move to the sides. The sides and base pieces should overhang the edge.
In the toilet roll holder cubby, use your sander to chamfer the inner of the pieces to prevent jamming when the door is opened.
GOOD TO KNOW
Apply 2 coats of sealer to all scrap wood and allow drying time between coats.
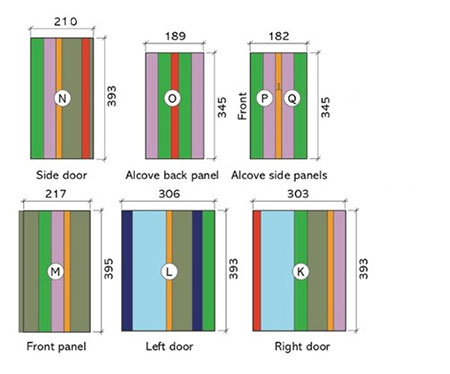
Scrap wood cutting and installation lists
While you may find the cutting and installation lists helpful, it all depends on the wood you will be working with. It might be preferably to cut and fit as you go so that everything fits perfectly.