
Painting tiles for a weekend makeover
If you use the right products, with the correct preparation and recommended application, your bathroom will look as good as new when you´re done!
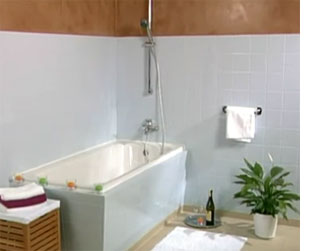
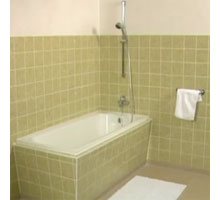
Contrary to popular belief, bathroom makeovers will not break the bank. Painting over old and dated ceramic tiles will immediately transform a bathroom or else you can beautify your bathroom with beautiful Bathroom Tiles Designs .
For bathrooms with high humidity levels, there are 2-part epoxy paints available to use on wall tiles. These give a hard wearing porcelain-like finish, but tend to come in a limited range of colours.
There are reputable products on the market that allow for a long-lasting and extremely durable finish on tiles. Rust-Oleum Specialty Tub & Tile Refreshing Kit acts and looks like porcelain and ceramic. This specialty epoxy paint product is recommended on tiles that have a highly glazed finish, and where oil-based paints would not properly bind to the surface of the tile.
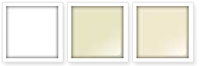
The only limitation to the use of Rust-Oleum Specialty Tub & Tile Refreshing Kit is the limited colour options, but the colours that are available are ideal for most bathrooms.
On matt tiles, you can use an oil-based paint, such as Prominent Paints Eggshell or non-drip enamel. Using an oil-based | enamel paints allows you to be creative with colour, but be careful not to go overboard with colour. It's best to keep to neutrals.
It's perfectly acceptable to use an oil-based gloss paint, for a durable and washable finish and that is suitable for damp atmospheres - when applied to matt finish wall tiles
HERE'S HOW:
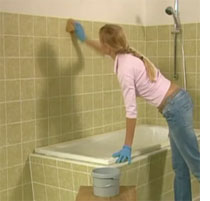
For a professional job it is essential that the proper preparation be done, especially when painting tiles. You need to give the tiles a thorough scrub, preferably using Sugar Soap, or a quality cleaning product. Your local Builders Warehouse staff will be able to advise on the best products available. Areas of mould or mildew need to be cleaned off with a solution of white spirit vinegar and warm water.
You can easily scrub grouted areas with an old toothbrush to get into all the cracks and crevices. Do note, however, that where grout needs to be repaired, this must be done at least at week in advance, so that it allows plenty of time for the new grout to dry before painting.
The tiles must be completely dry before painting. It is also best to tackle this project during the spring or early summer, when the weather is not too hot and there is no chance of rain, so as to allow the painted surface to cure as quickly as possible.
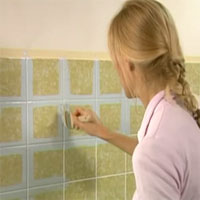
1. Paint grouted area
Use a medium paintbrush to apply paint to the grouted areas first. If you don't want to paint the grout, I have previously used thin automotive tape - applied over the grout - to protect it from being painted over.
DIY TIP:
I like to use 120-grit wet/dry sandpaper to lightly sand the tile surface and improve paint adhesion. Wipe clean once finish to remove all traces of dust.
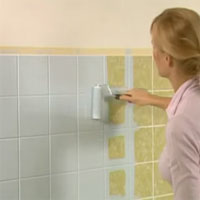
2. Paint tile surface
Continue to paint over the tiles, only this time with a foam paint roller. Paint from side to side and top to bottom to ensure even coverage over the wall.
If a second coat is recommended - or required- allow the recommended drying time between coats.
GOOD TO KNOW
To extend the life of the painted finish, avoid using abrasive cleaning products.